Reports
The Reports module is where you turn everyday tracking data — timesheets, attendance, productivity, and project allocation — into a file you can download, save, and share. This guide explains, in plain terms, how to open each report, what every field on the screen means, and what you get back once you export.
Reports does not show your results on the screen as a table or a chart. Instead, you fill in a short form, click Export, and then download the finished Excel or PDF file from the Export History tab once it is ready.
Leave Report is currently disabled on ITP. It is visible as a card in Reports, but generating a Leave Report is not available for use at this time. See Leave Report below.
Reports Overview
Purpose of the Reports module
Reports exists so that managers, program managers, accountants, and administrators can pull organized, shareable records out of the data the rest of the application already collects — without having to browse through the live Timesheet, Attendance, or Project screens.
How to open Reports
Go to the main menu and select Reports. This opens the Reports Overview page, which shows one card for each report you have access to.
If Reports is not visible in your menu at all, your account may not have access to this module — check with your administrator. If Reports is visible but a specific card is missing, your account has not been given access to that particular report.
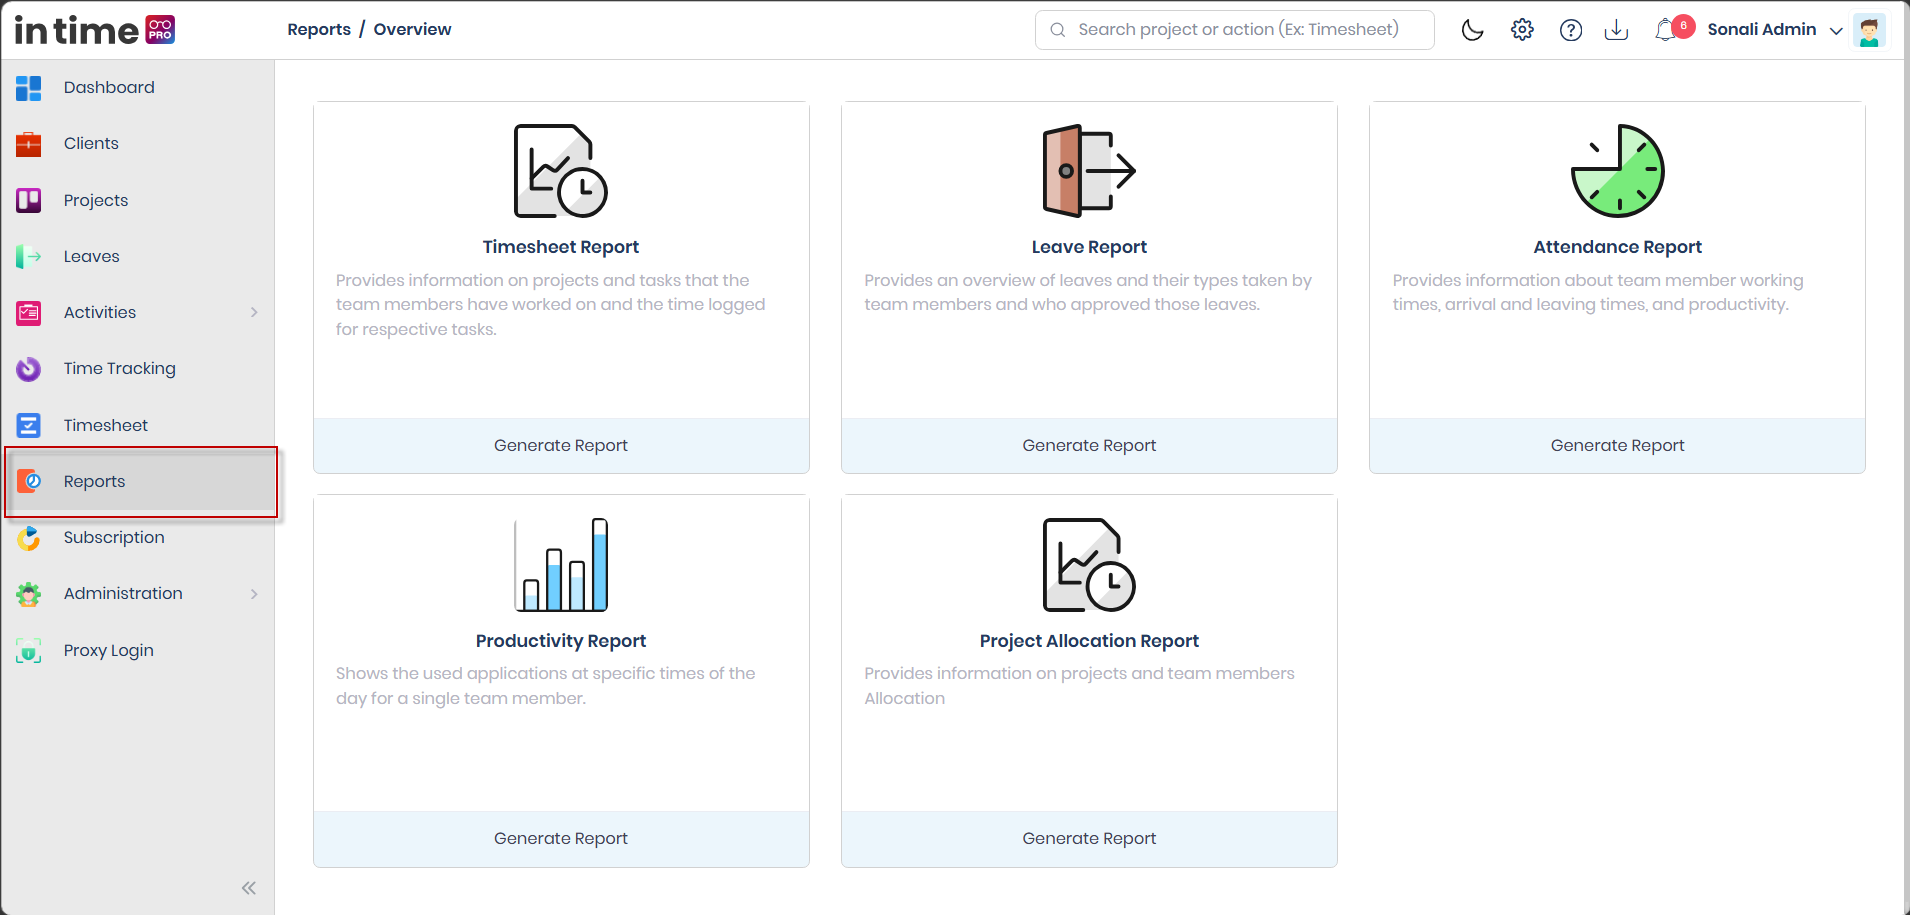
Reports available
| Report | Purpose — what it tells you | How you start it | Status |
|---|---|---|---|
| Timesheet Report | Shows the projects and tasks your team worked on, and the hours logged and billed, for a period you choose. | Select the Timesheet Report card, then Generate Report. | Available |
| Leave Report | Intended to show leave types taken by team members and who approved them. | Card is visible on the Overview page. | Disabled — not available for use |
| Attendance Report | Shows team member working times, arrival/leaving times, and productivity. | Select the Attendance Report card, then Generate Report. | Available |
| Productivity Report | Shows the applications used, at specific times of day, for a team member. | Select the Productivity Report card, then Generate Report. | Available |
| Project Allocation Report | Shows which team members are allocated to which projects, and projected vs. actual hours. | Select the Project Allocation Report card, then Generate Report. | Available |
Selecting a card takes you straight to that report's Generate Report screen — there is no extra screen in between.
What you can see depends on your role
Not everyone sees every card, and not everyone can pick from the same list of projects and people once a report is open:
- Admins and Super Admins normally see all report cards and can choose from every project and every team member.
- Managers and Program Managers normally see all report cards and can choose from the projects they manage or are part of, along with the members on those projects.
- Accountants and Contractors normally see all report cards, and can choose from the same projects as above, but when it comes to Team Members, the list they see is usually limited to themselves rather than the full project team.
- Employees do not see any report cards by default. An administrator can grant access if needed. Where access is granted, an Employee's own reports are generally limited to their own data.
- Clients are granted no Reports permission in the standard permission set. However, the Client Portal navigation still shows a Reports link for every Client — what a Client actually sees if they open it is not confirmed in this documentation (ON HOLD, product confirmation required).
If a list of projects or team members looks shorter than you expect, this is usually because of your role rather than a fault in the filter you selected.
Whatever you generate is only visible to you. Export History is personal — a report a colleague generated, even for the same project, will not appear in your own Export History.
Timesheet Report
Purpose
Timesheet Report gives you a downloadable record of the projects and tasks your team has worked on, and the hours they logged and billed, for a period you select. It is useful for record-keeping, sharing status with stakeholders, and supporting billing/payroll review — anywhere a saved file is more convenient than looking through the live Timesheet screens.
How to Open
- Go to the main menu and select Reports.
- Select the Timesheet Report card.
You land on the Generate Report tab.
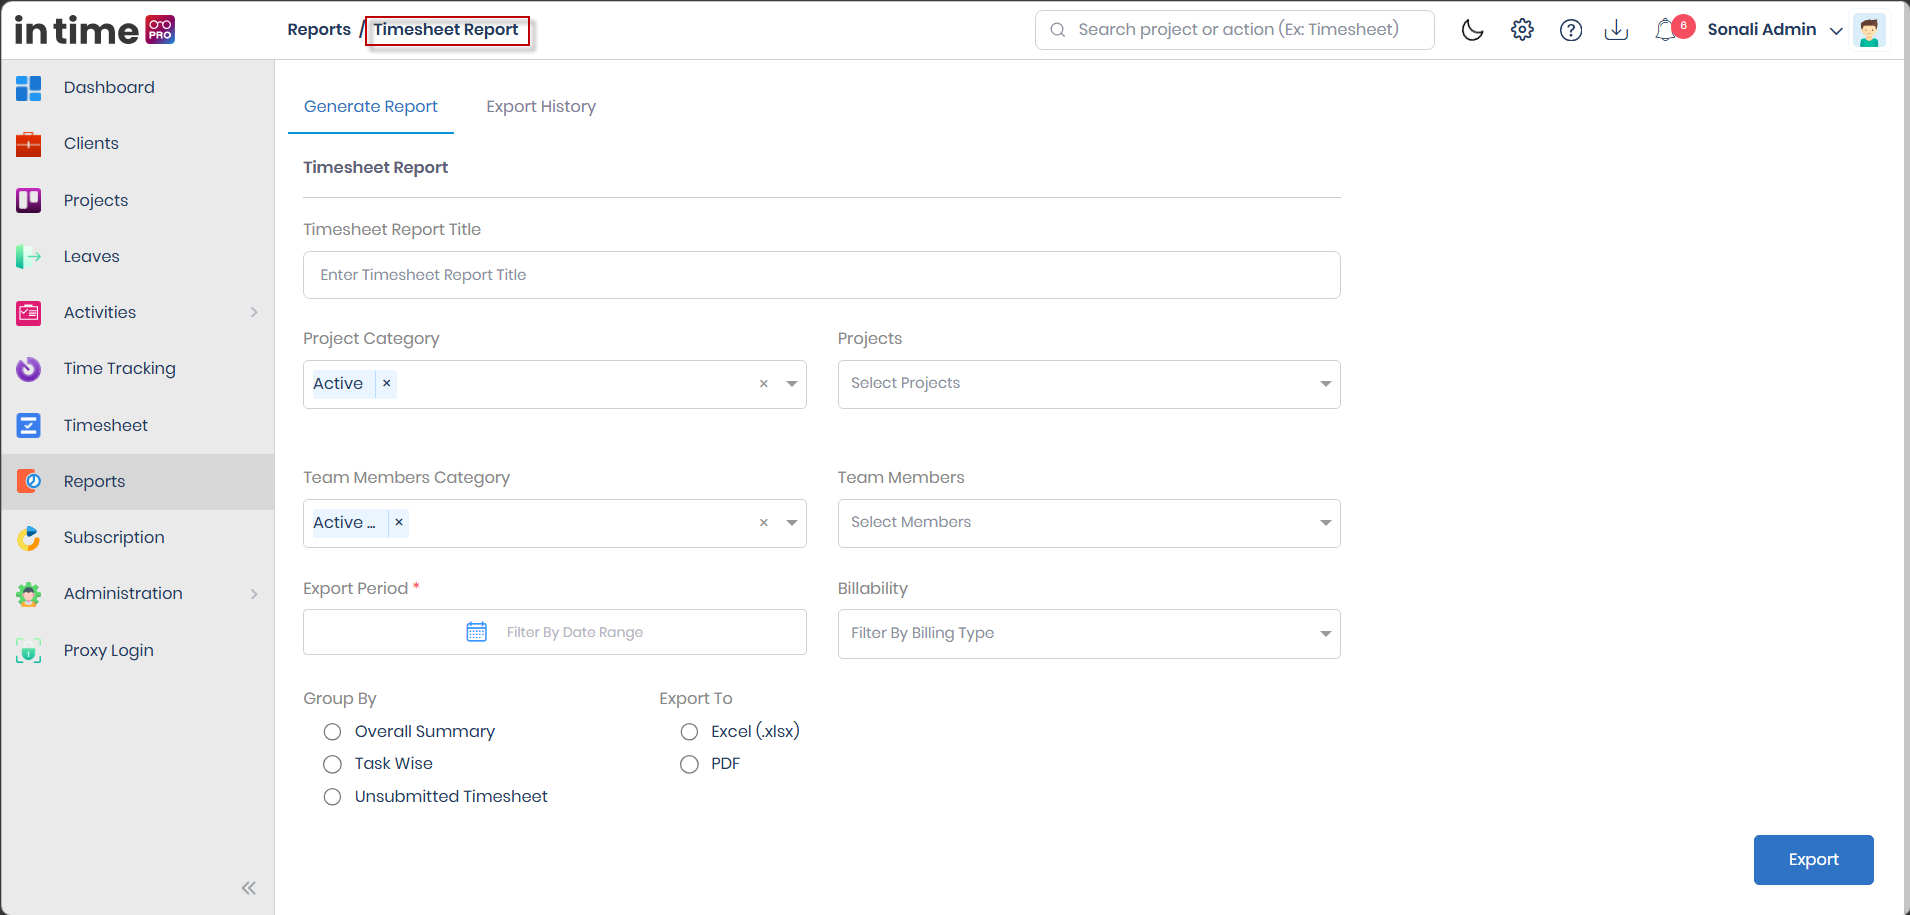
Generate Report
The Timesheet Report screen has two tabs:
| Tab | What it is for |
|---|---|
| Generate Report | Fill in your filters and start a new export. |
| Export History | Check progress, and download or delete reports you have already started. |
Fill in the fields below on the Generate Report tab, in whatever order suits you — most are optional, and only the Export Period must be filled in before you can export.
Timesheet Report Title
What it is: A short label for your report.
Why you need it: It becomes the name of the file you eventually download, which makes it easier to find later among your other downloads.
How to fill it: Type any short, meaningful title — for example, Timesheet Report - August 2026.
Required: No. If you leave it blank, the downloaded file uses a standard default name instead (for example, "Overall Summary Timesheet Report").
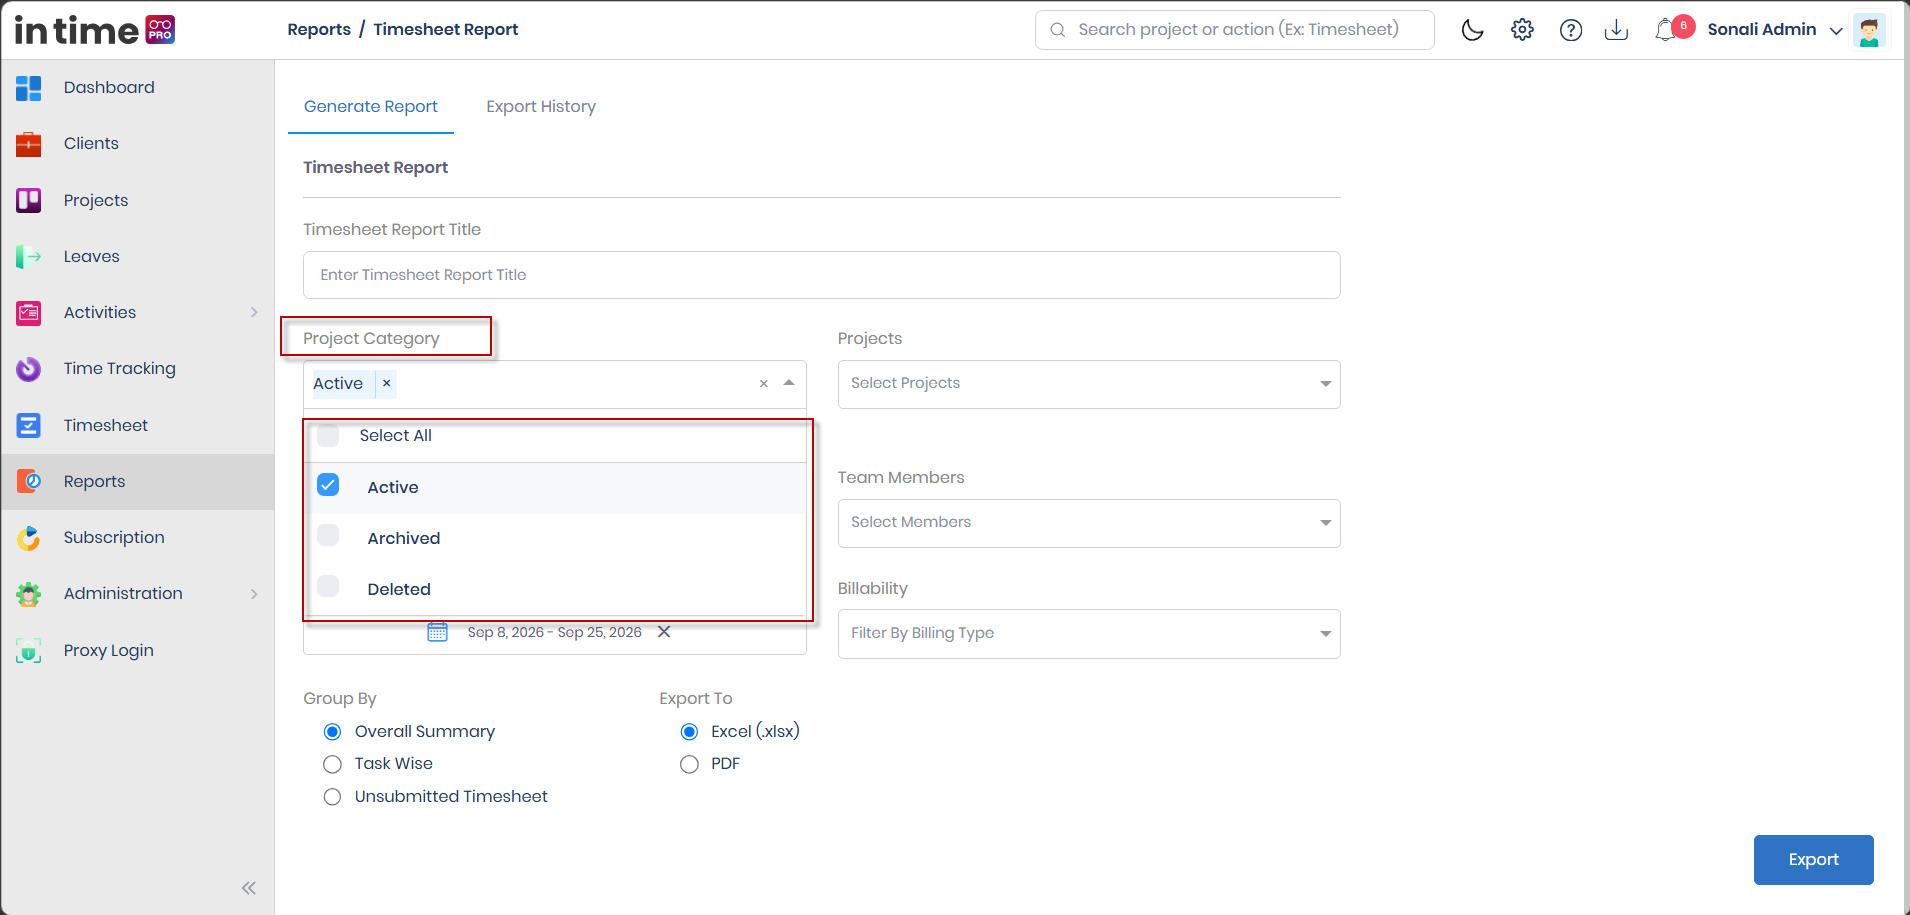
Project Category
What it is: A quick way to narrow down the list of projects offered in the Projects field below it.
Why you need it: So you are not scrolling through projects that are no longer relevant (for example, deleted ones) unless you actually want to include them.
How to fill it: Select one or more of: Active, Archived, Deleted.
Required: No — Active is selected for you by default when the page opens.
What happens after you select it: The Projects list below updates to show only projects in the category (or categories) you picked.
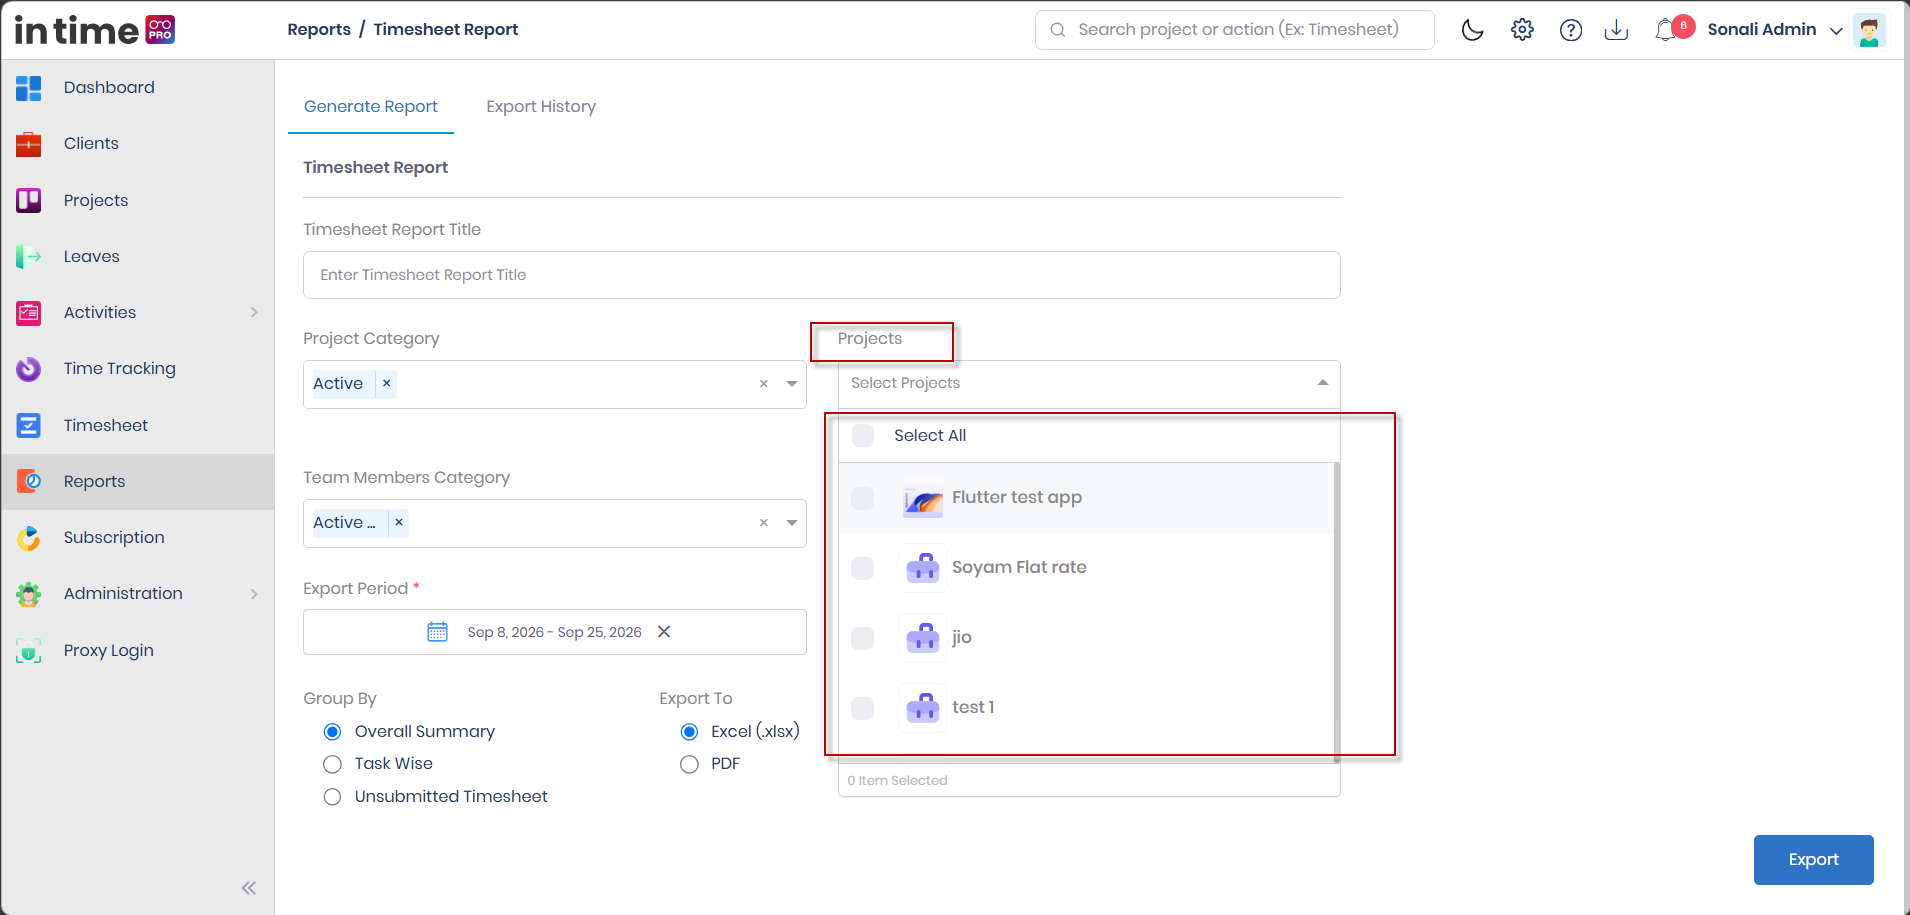
Projects
What it is: The list of projects to include in your report.
Why you need it: So you can focus the report on one project, a few projects, or leave it open to everything you have access to.
How to fill it: Select one or more projects from the list. Each project is shown with its name and icon.
Required: No. If you leave this empty, the report covers every project you have access to, not just one.
What happens after you select it: The Team Members list below automatically updates to show only the people on the project(s) you selected.
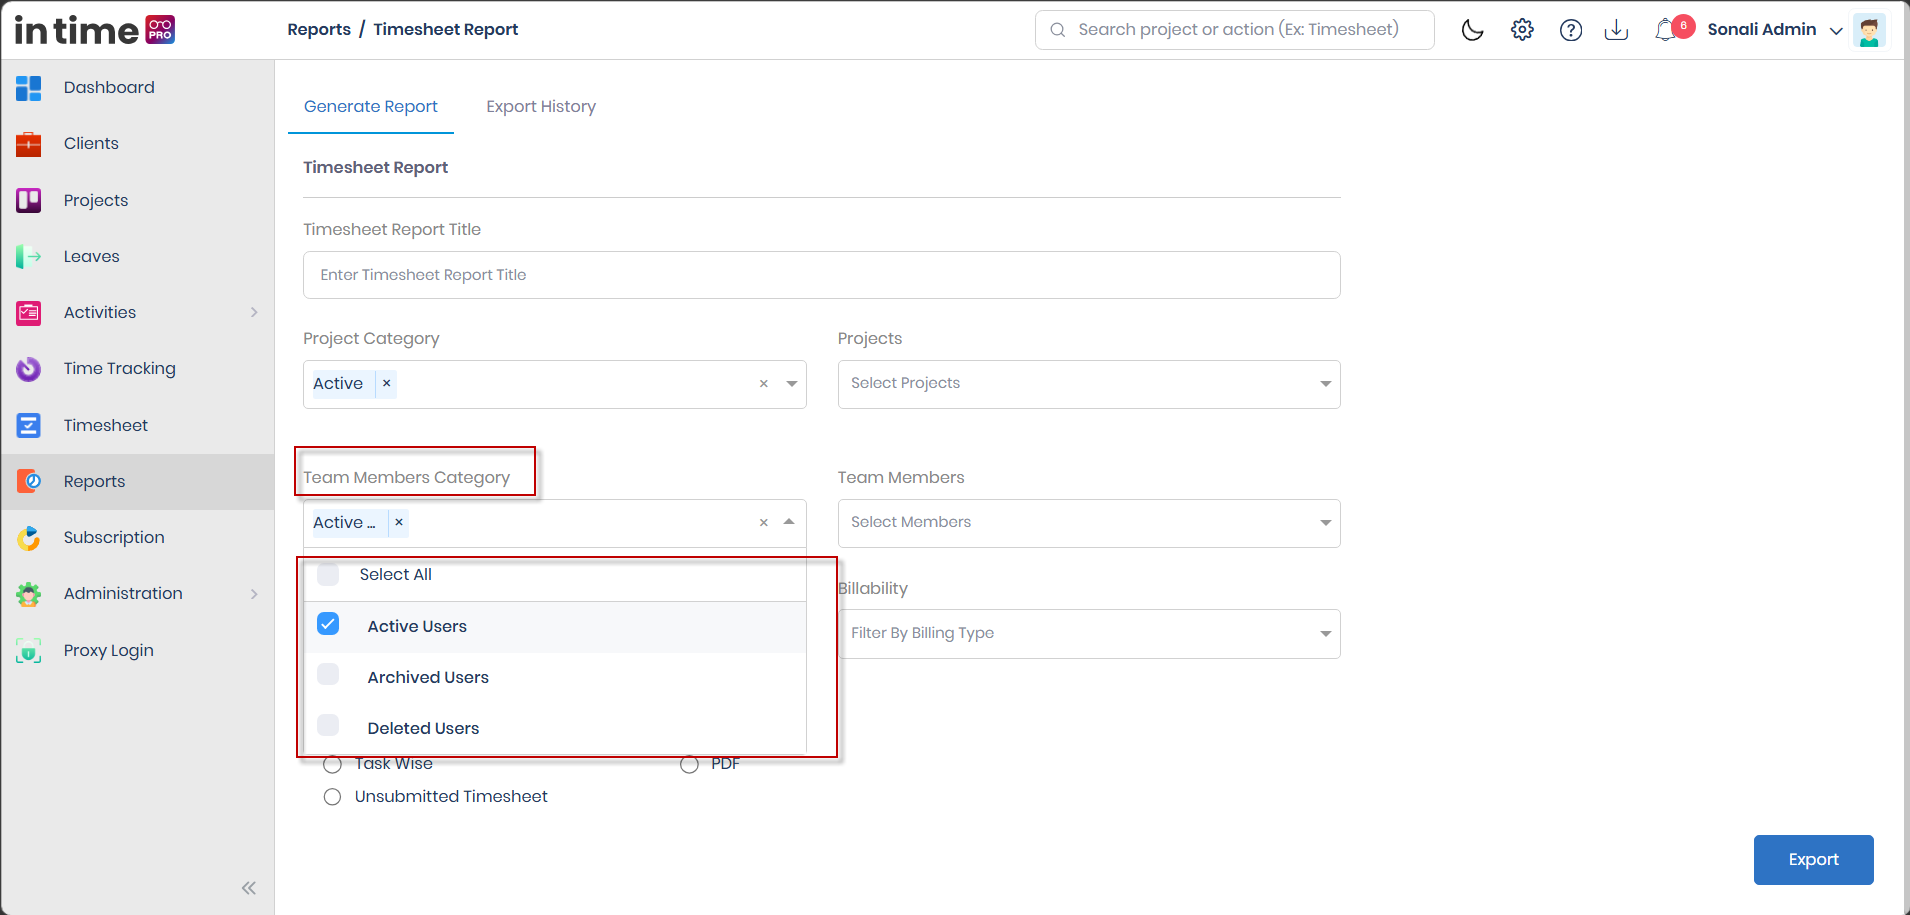
Team Members Category
What it is: Works the same way as Project Category, but for people instead of projects.
How to fill it: Select one or more of: Active Users, Archived Users, Deleted Users.
Required: No — Active Users is selected by default.
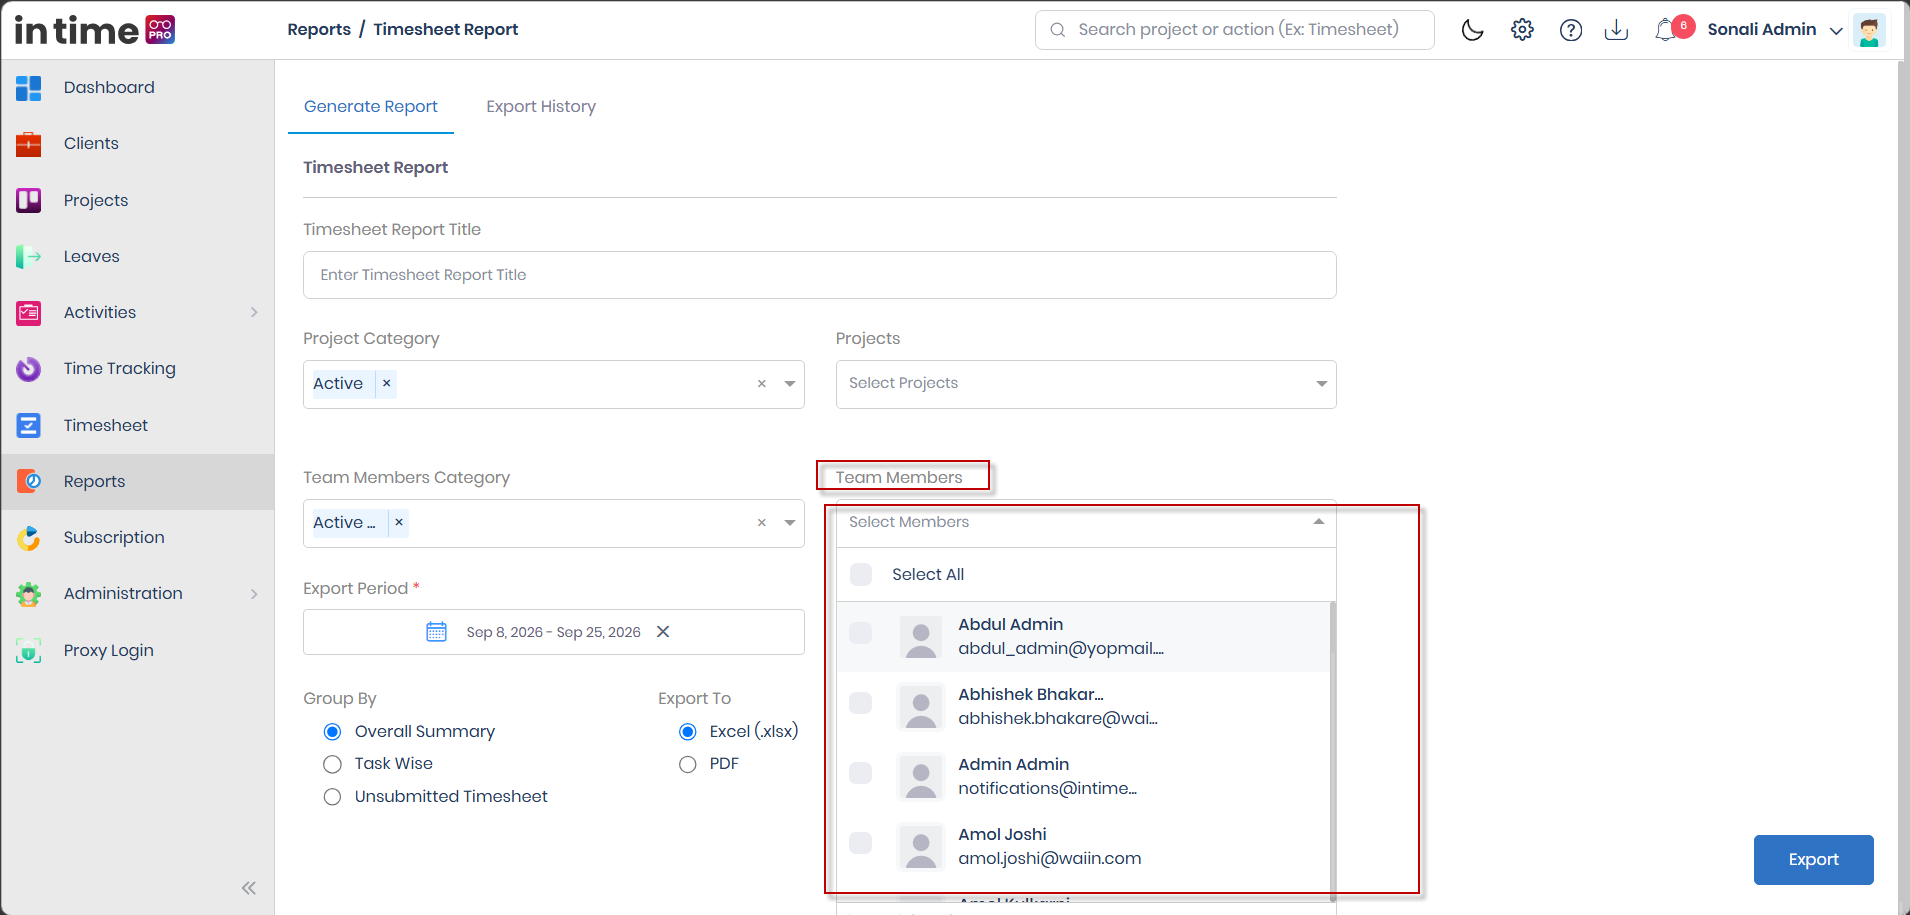
Team Members
What it is: The specific people to include in your report.
Why you need it: So you can generate a report for a single person, a few people, or your whole visible team.
How to fill it: Select one or more team members. Each person is shown with their photo, name, role, and email address, to help you pick the right person when names are similar.
Required: No. If you leave this empty, the report includes everyone currently listed for your selected project(s) and category — which, depending on your role, may only be yourself (see What you can see depends on your role).
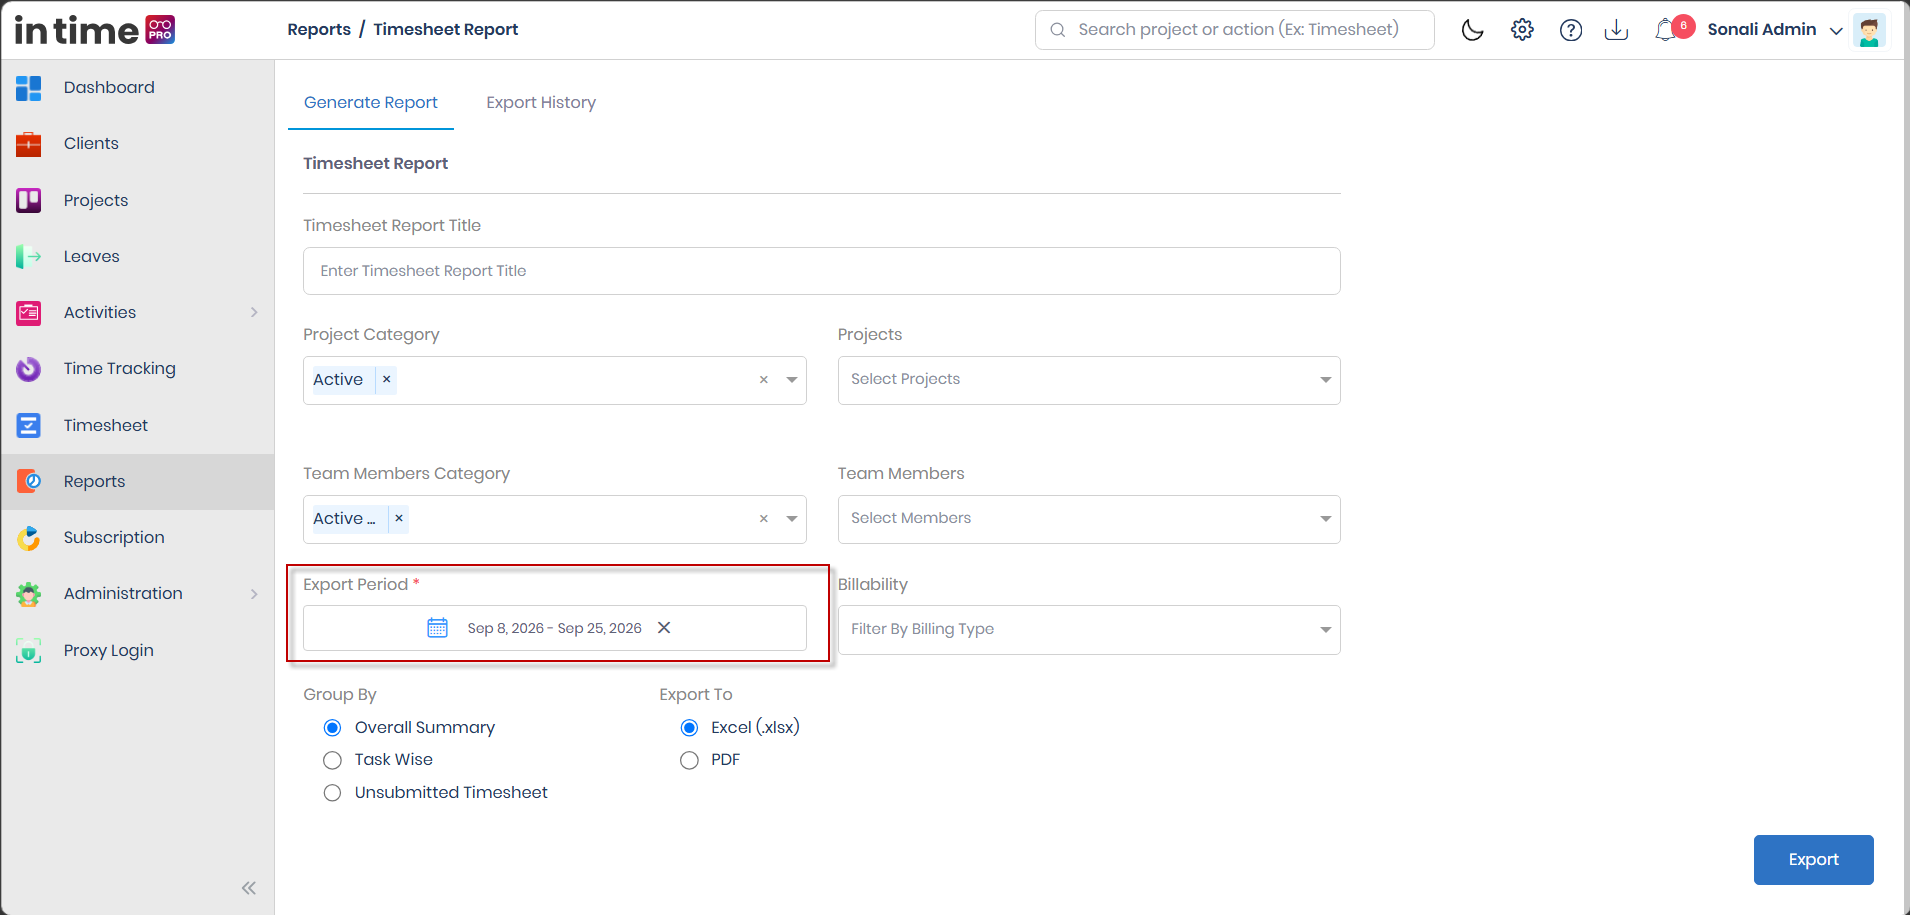
Export Period
What it is: The date range your report covers. This is the one field you must fill in on every report.
Why you need it: Every Timesheet Report is built around a specific period — a week, a month, or any custom range you choose.
How to fill it: Open the date picker and choose a start date and an end date.
Required: Yes. If you try to export without selecting a period, you will see a message telling you the Export Period is mandatory.
Tip: A clear (×) control next to the date field lets you reset the range and pick a new one.
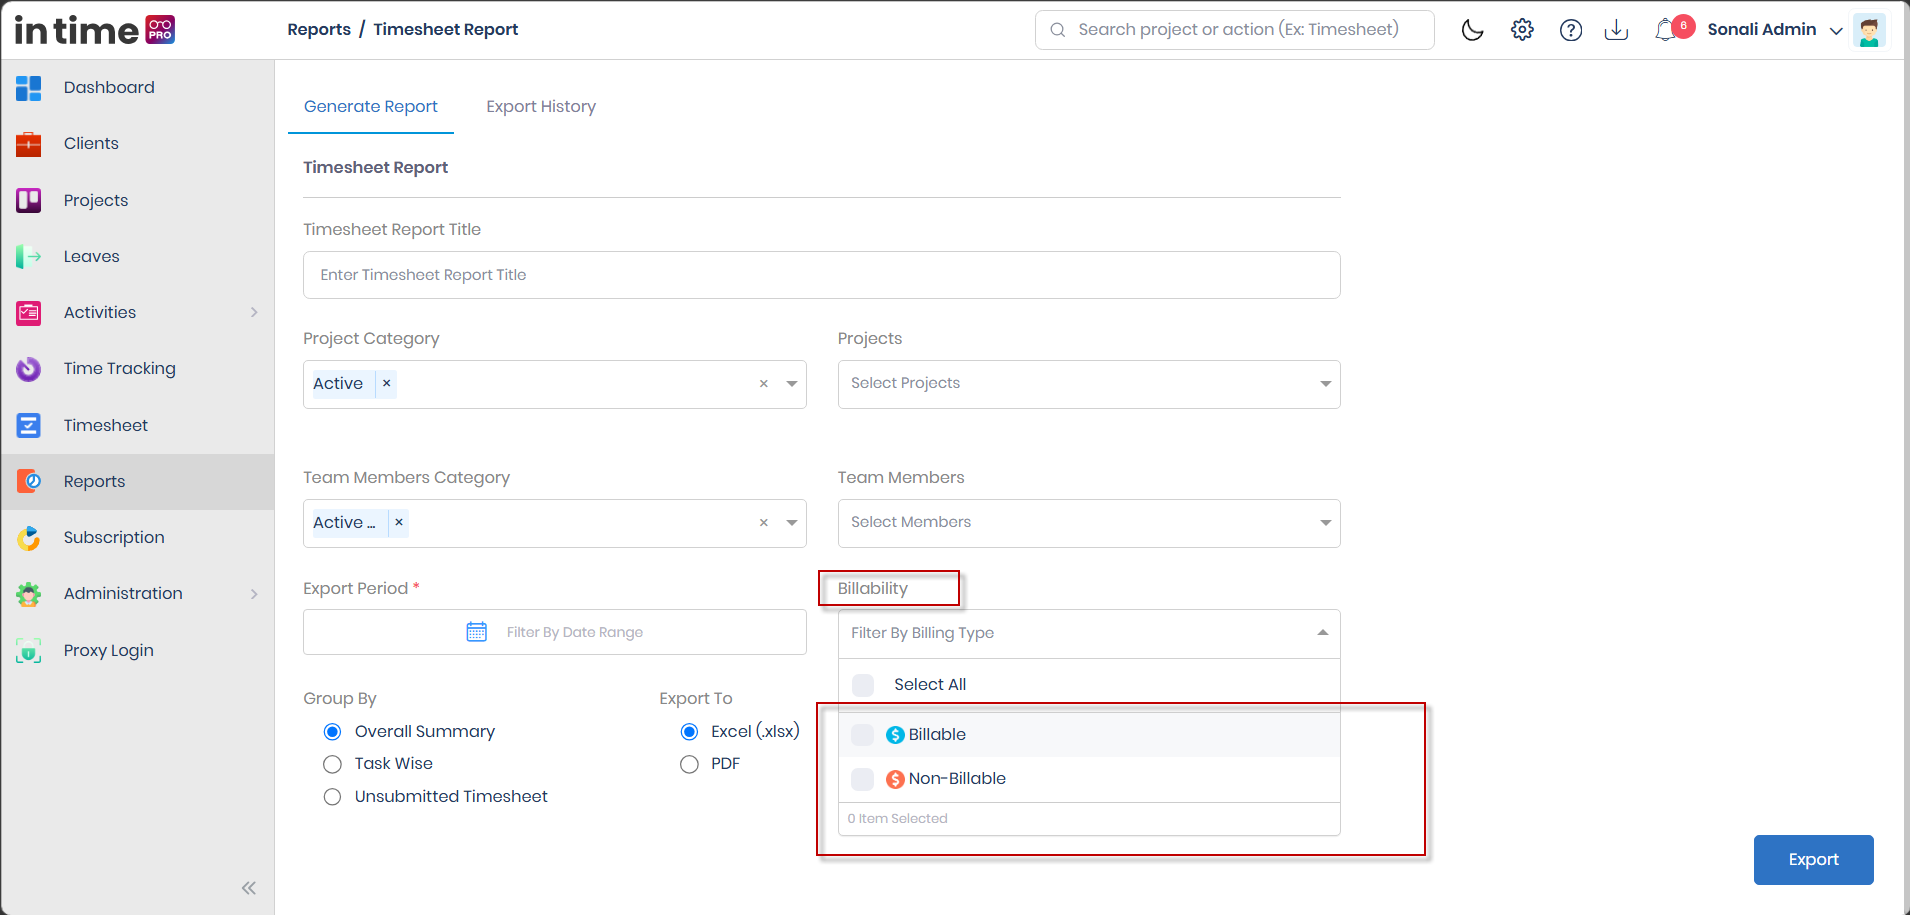
Billability
What it is: A filter for whether the recorded work is billable to a client.
Why you need it: Useful when you specifically want to see only chargeable work, or only internal/non-chargeable work.
How to fill it: Select Billable, Non-Billable, or both.
Required: No. If you do not select either option, the report includes both billable and non-billable work.
Group By
What it is: Controls how the exported data is organized and summarized.
Why you need it: Different situations call for a different level of detail — a high-level summary, a task-by-task breakdown, or a list of missing submissions.
How to fill it: Choose one of the three available options:
| Option | What it gives you |
|---|---|
| Overall Summary | A summary row for each project, employee, and day, showing logged hours, billed hours, and non-billed hours. This is the default option. |
| Task Wise | The same period broken down to the individual task level — including task status, estimated hours, and the reason given for any non-billable time. |
| Unsubmitted Timesheet | A list of working days in your selected period where a timesheet was expected but never submitted, for your selected projects and people. |
Required: Yes, once the page has finished loading your projects — if you try to export without a Group By selection, you will be asked to select a report type first.
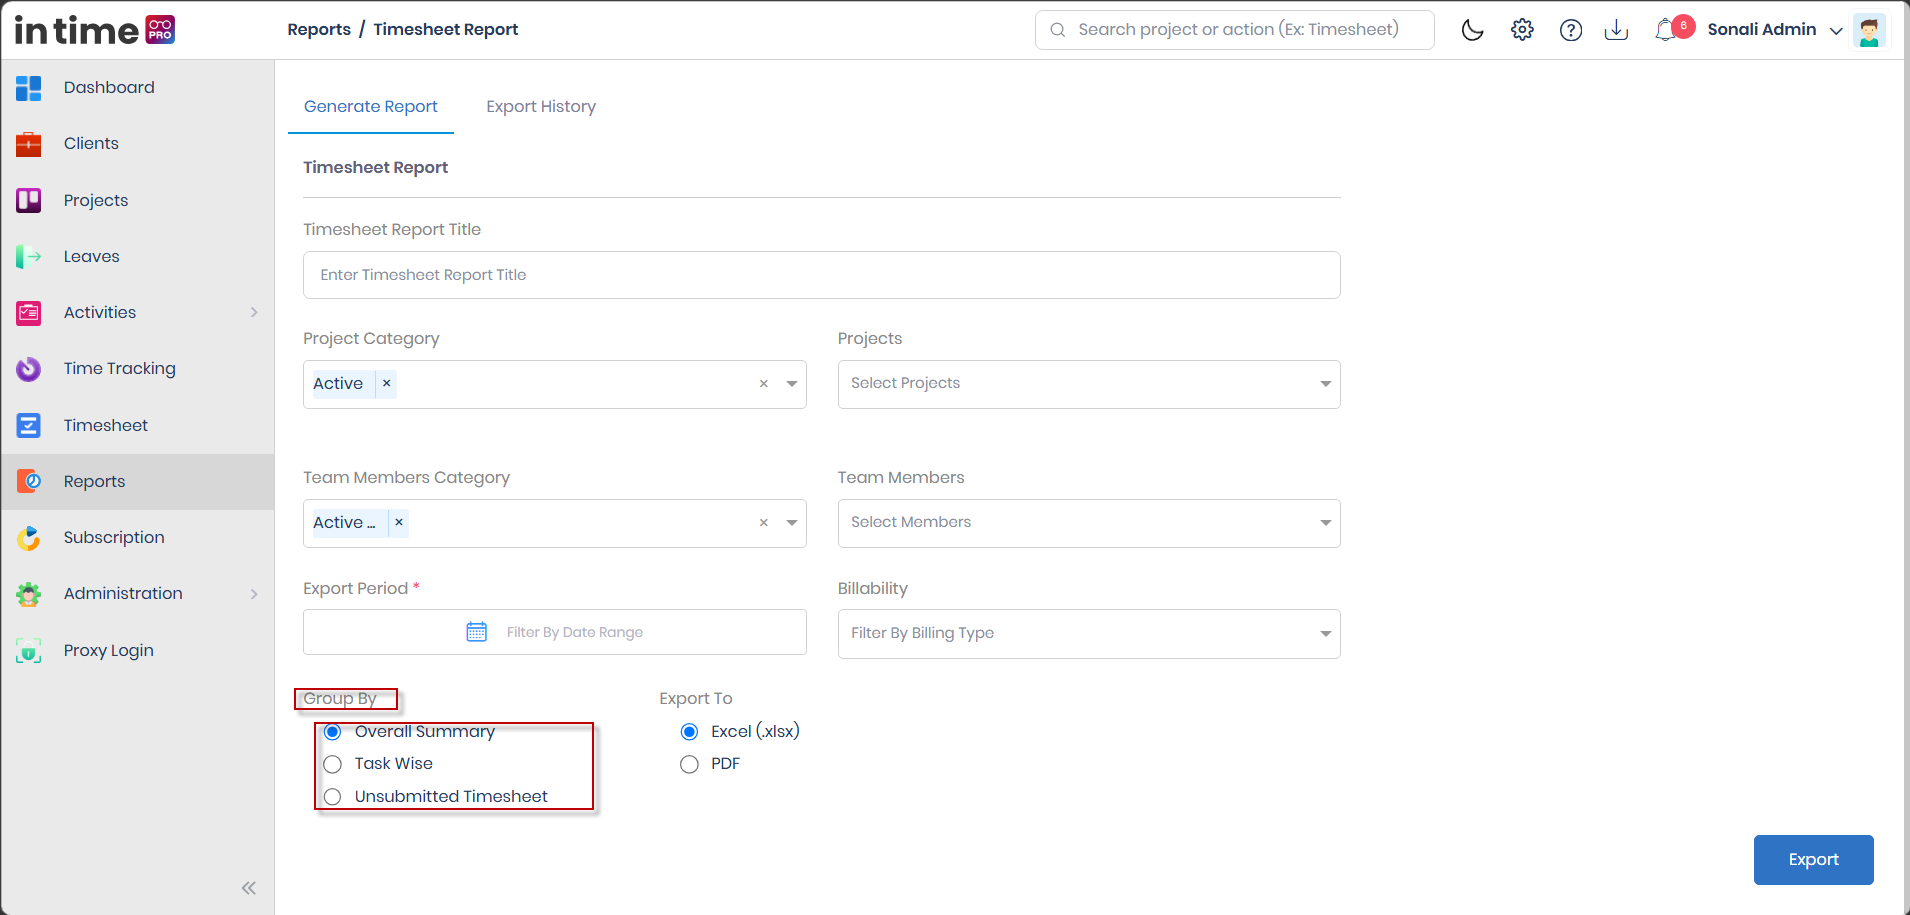
Only the three options above are currently offered. Additional groupings you may have seen described elsewhere (such as an Employee-wise or Date-wise summary) are not available from this screen.
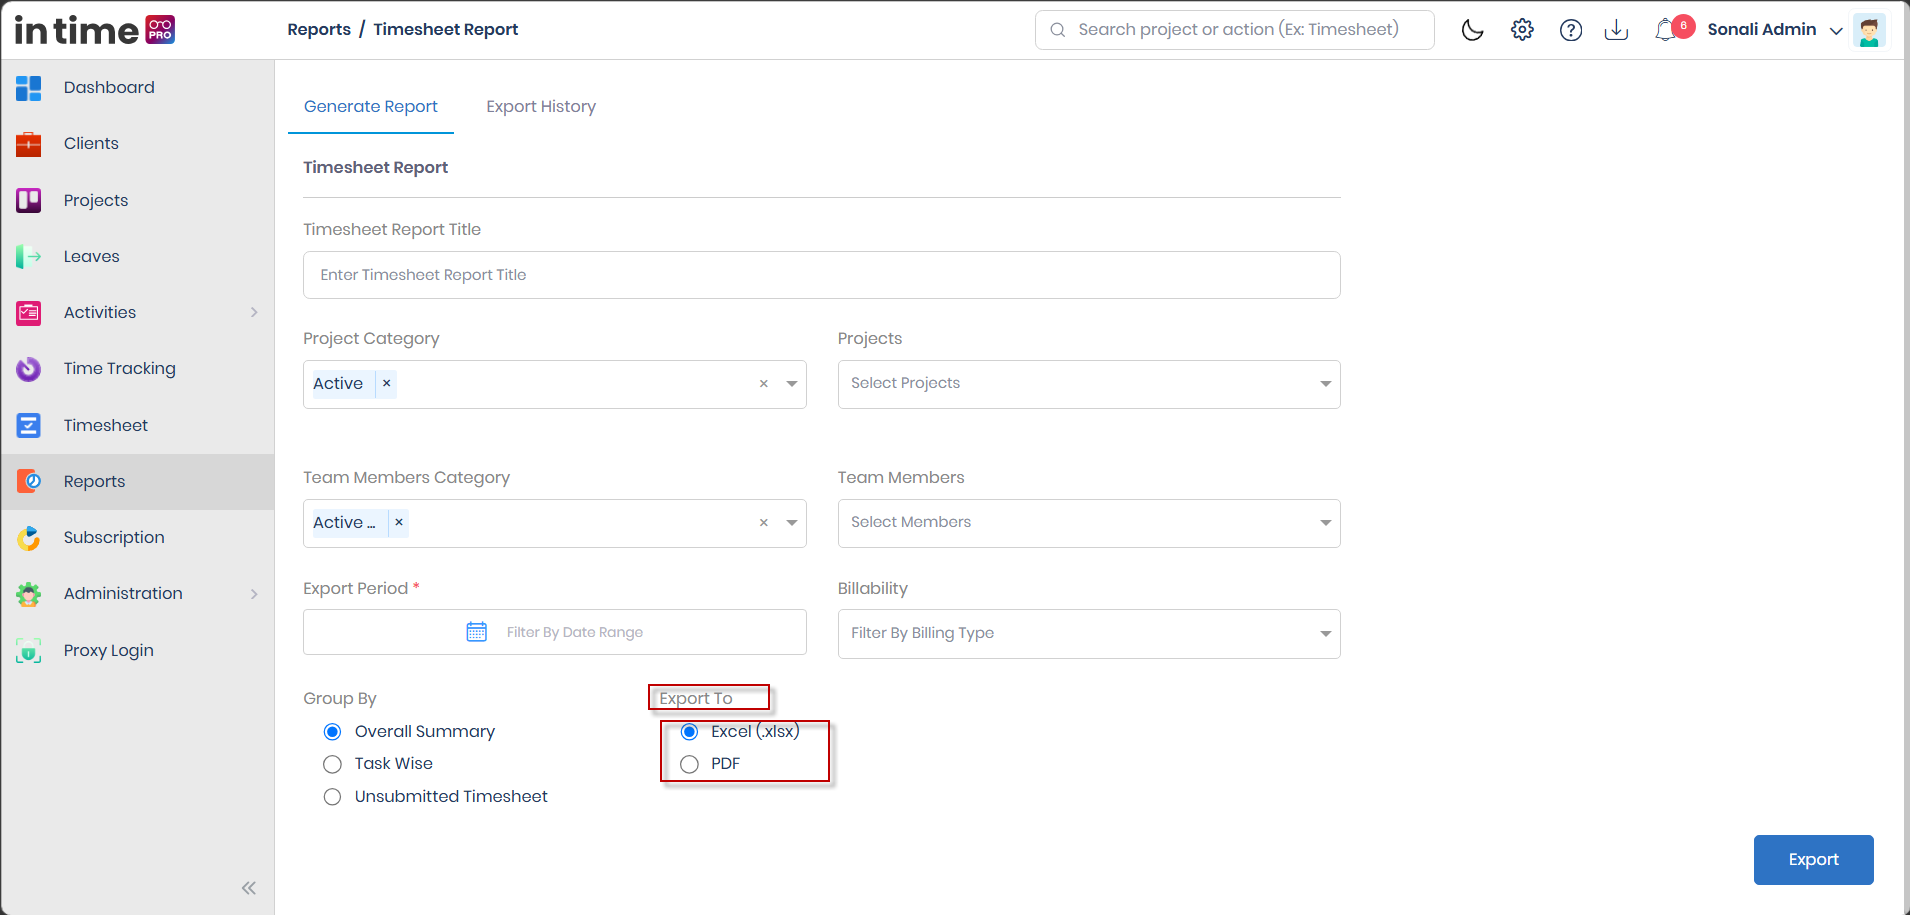
Export To
What it is: The file format you want to download.
Why you need it: Excel is better if you want to filter, sort, or do further calculations on the data yourself. PDF is better if you just need something to view or share as-is.
How to fill it: Choose Excel (.xlsx) or PDF.
| Format | When it is available |
|---|---|
| Excel (.xlsx) | Always available, for every Group By option. |
| Available for Overall Summary and Task Wise. Not available when Unsubmitted Timesheet is selected. |
Required: Yes, once the page has loaded — if no format is selected, you will be asked to select an export type before you can continue.
Default: Excel is selected for you automatically once the page finishes loading.
Exporting the Report
Once you have filled in the Export Period, chosen a Group By option, and confirmed your export format, select Export.
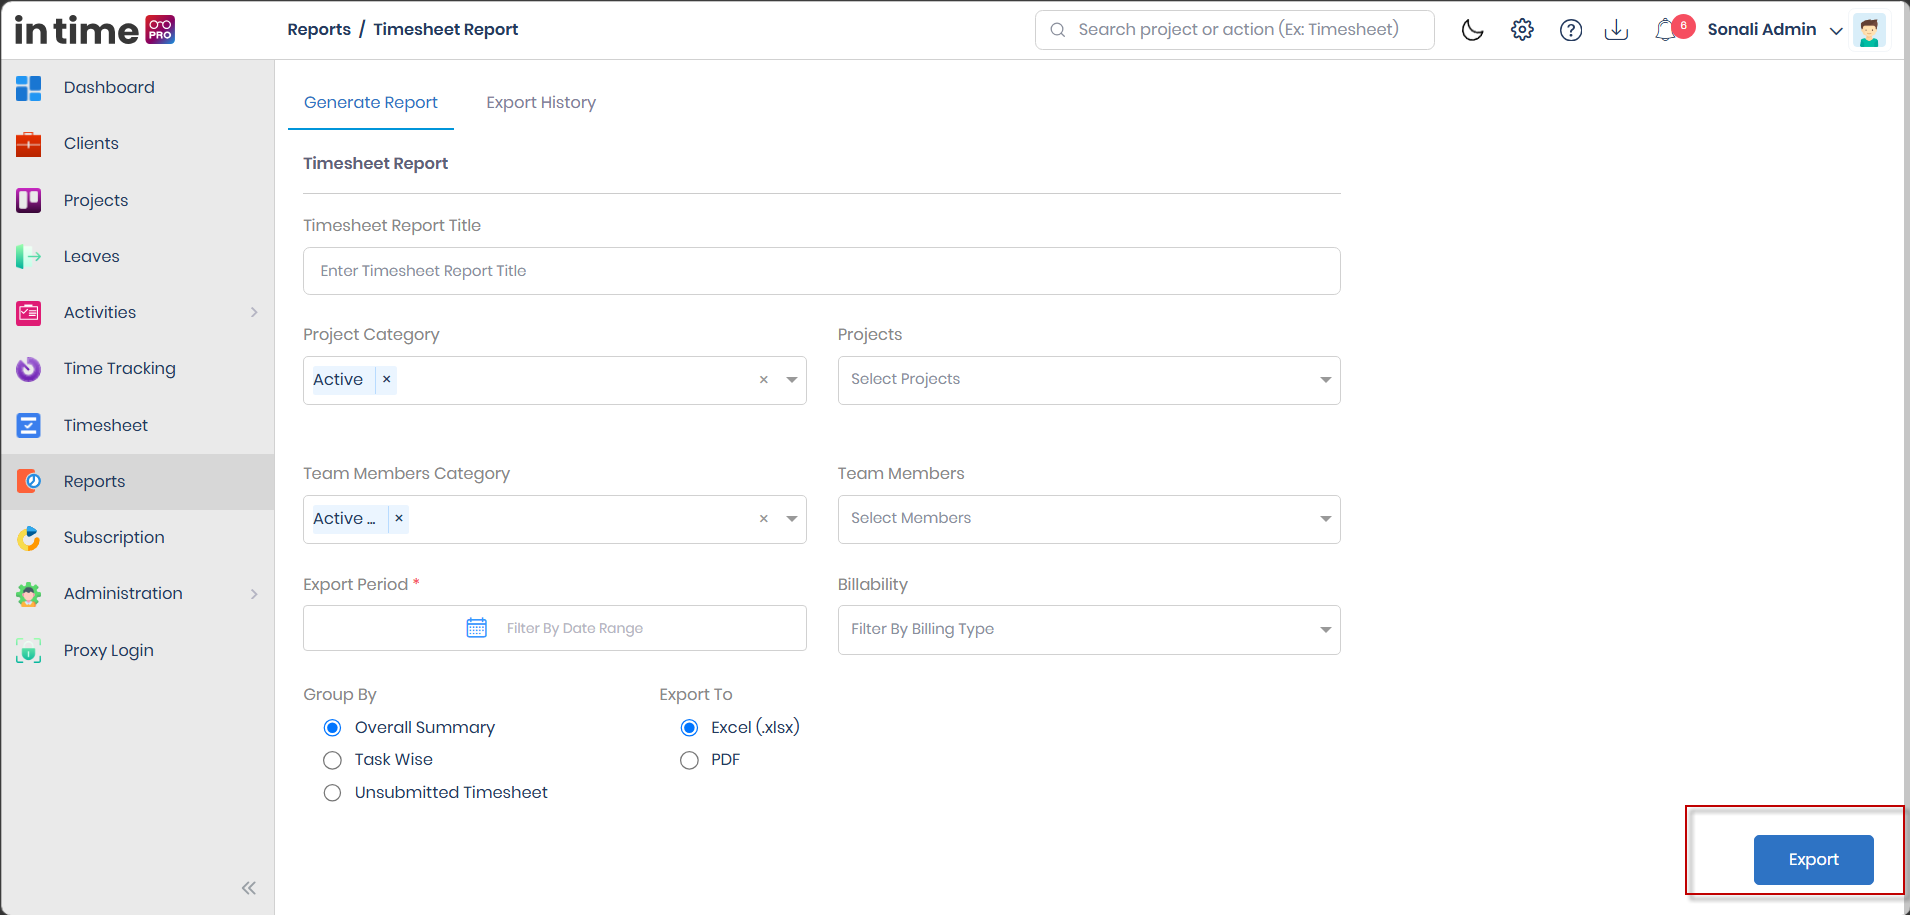
What happens next:
- The screen checks that your required fields are filled in. If something mandatory is missing, you will see the relevant message (see the tables above).
- Your export starts, and you are automatically switched to the Export History tab.
- Your report does not appear immediately — it is prepared in the background, and a progress indicator shows how far along it is.
- Once it reaches 100%, a Download link appears in place of the progress bar.
No separate confirmation message is shown after you select Export. This is expected behavior, not a bug. Instead of a success pop-up, the screen simply switches you to the Export History tab, where your new report appears with its progress. This is how you confirm that your export started successfully.
Export History
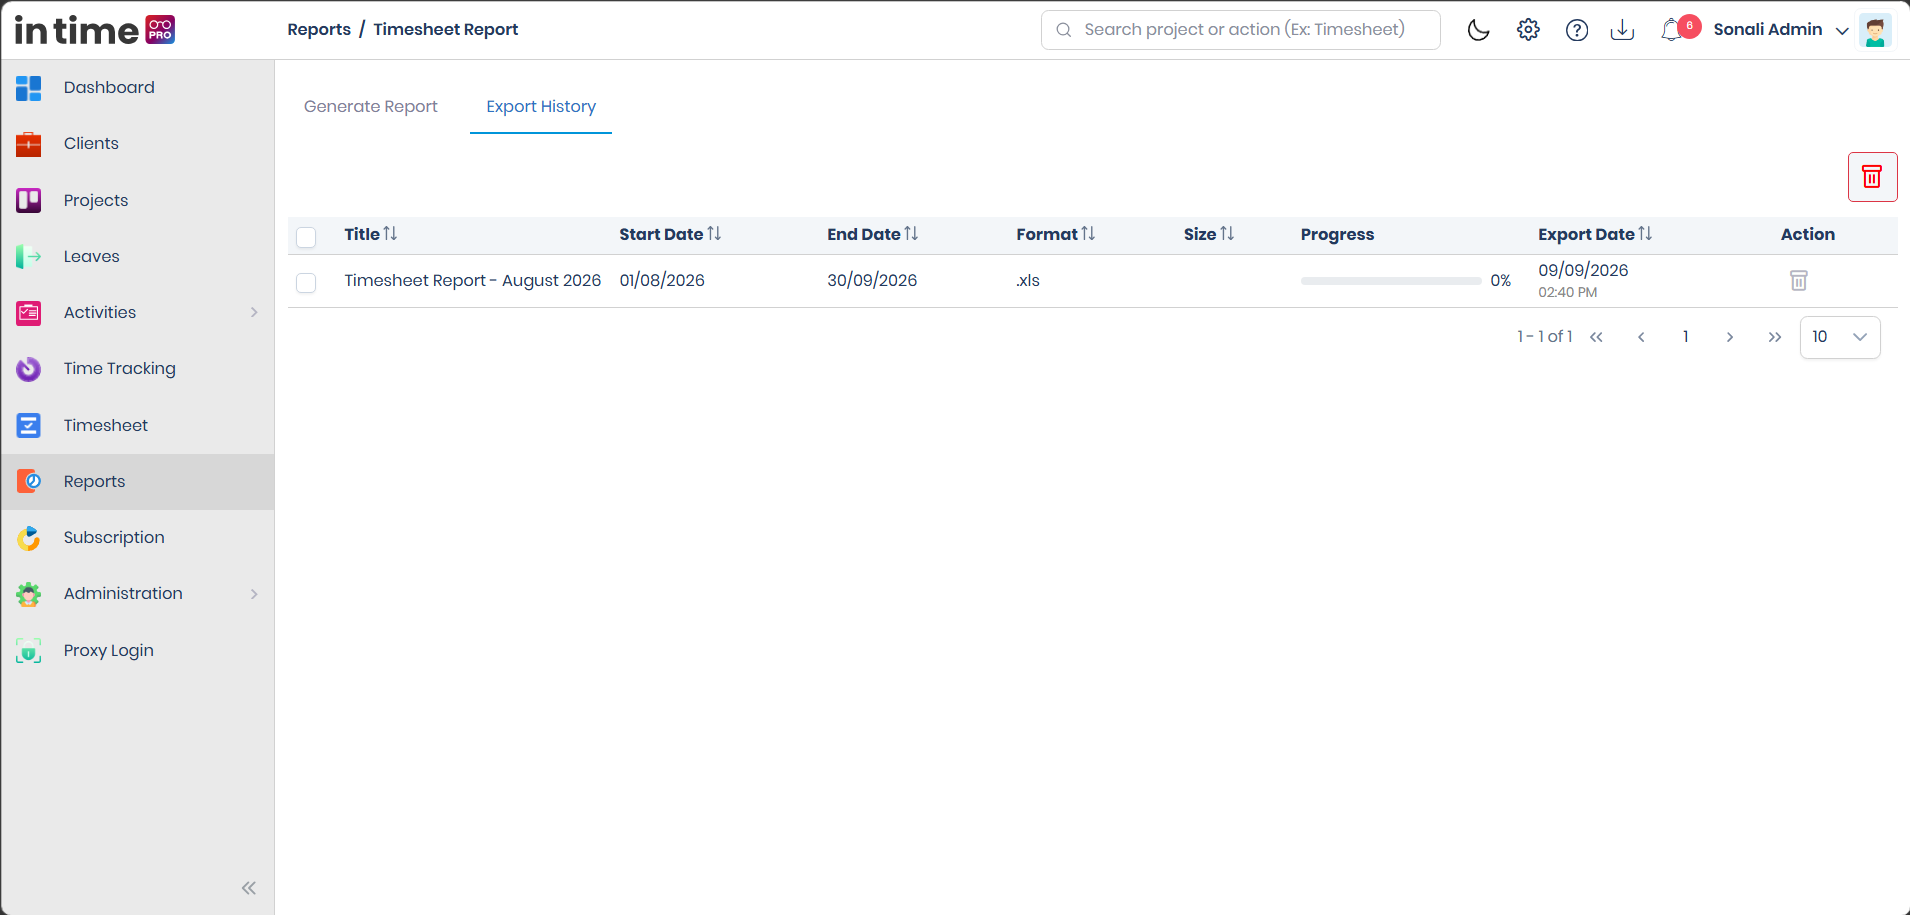
What it is for: Because Reports never shows results directly on the screen, Export History is where you track, download, and manage every report you have generated for Timesheet Report.
What you see: A row for every export you have started, most recent first, including ones still in progress.
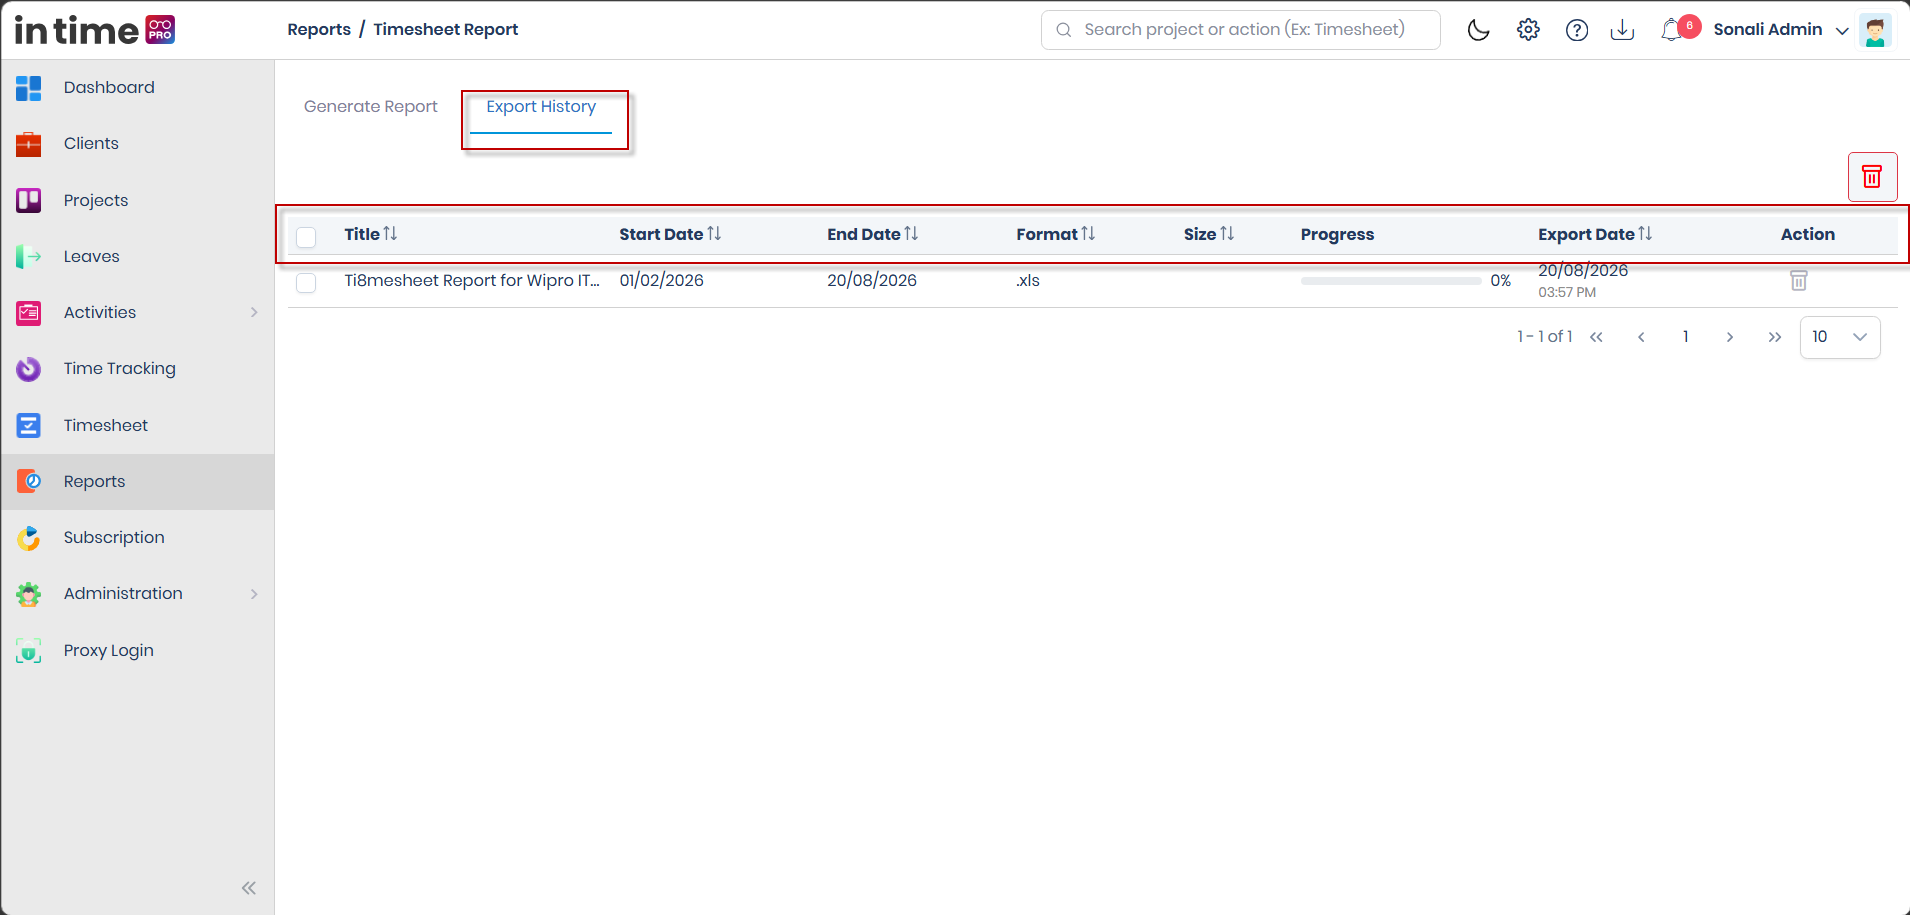
Columns shown:
| Column | What it means |
|---|---|
| Title | The title you typed, or the default name if you left it blank. |
| Start Date / End Date | The period covered by that export. |
| Format | Whether the file will download as Excel or PDF. |
| Size | The file size — this stays blank while the report is still being prepared. |
| Progress / Download | A progress bar while your report is being prepared; once it finishes, this turns into a Download link. |
| Export Date | When you started that export. |
You can sort the list by selecting a column header (for example, Title or Export Date), and switch between page sizes of 10, 20, 30, 50, or 100 rows.
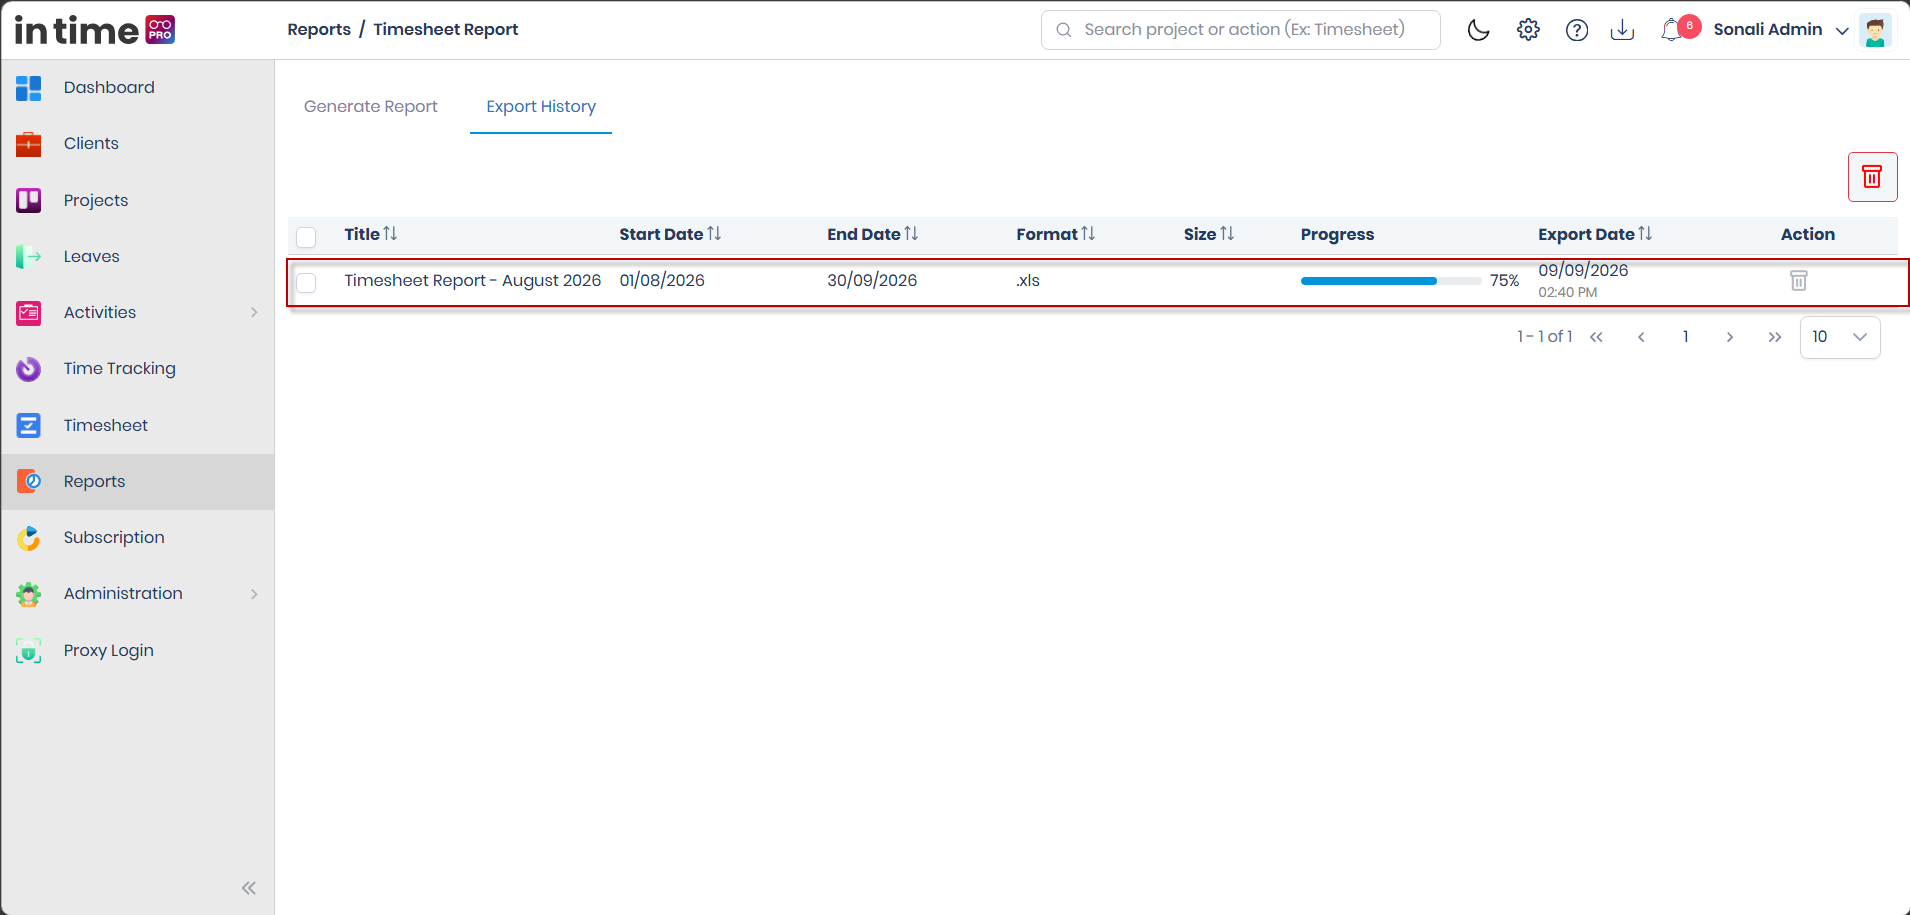
Downloading: Select Download once it appears. Your file is produced and saved to your computer at that point.
Deleting a report:
- To remove a single report, select the delete icon on its row and confirm — this cannot be undone, and the file will no longer be available to download.
- To remove several at once, tick the checkboxes on the rows you want to remove, then use the delete button above the list. If you try this without selecting any rows, you will be asked to select a report first.
- You cannot delete a report while it is still being prepared — the delete option becomes available only once it is finished (or has failed).
If the list is empty: you will see a message indicating there is nothing to show yet — this simply means you have not generated any Timesheet Reports so far, or have deleted all of them.
If an export finds no matching data: a message lets you know no records were found, instead of producing an empty file.
Report Output
What you get in your downloaded file depends on the Group By option you chose:
- Overall Summary — one row per project, employee, and day: Project Name, Employee Id, Employee Name, Week Number, Project Role, Timesheet Date, Logged Hours, Billed Hours, Non-Billed Hours, and Timesheet Status. (Non-billed hours is simply logged hours minus billed hours.)
- Task Wise — the same information, plus Task Job, Tasks, Estimated Hours, Billability, the reason given for any non-billable time, Task Status, and Comments.
- Unsubmitted Timesheet — a plain list of Project Name, Employee Id, Employee Name, Project Role, and Timesheet Date for each working day that has no submitted timesheet. Days already covered by approved leave or a public holiday are not included in this list.
A few things worth knowing about how the numbers are worked out:
- Logged hours combine manually entered time and time recorded through timers, without counting the same task and day twice.
- Billed hours are the portion of logged hours marked as billable.
- Timesheet entries that were rejected are not counted in any Timesheet Report figure.
[SCREENSHOT: Timesheet Report – Sample Excel Output]
Leave Report
Current Status
Leave Report generation is currently disabled on ITP and is not available for use at this time. This functionality is planned for future implementation.
The Leave Report card is visible on the Reports Overview page, with a description indicating it is meant to provide an overview of leave types taken by team members and who approved them. However, you cannot currently generate, export, or download a Leave Report from this screen.
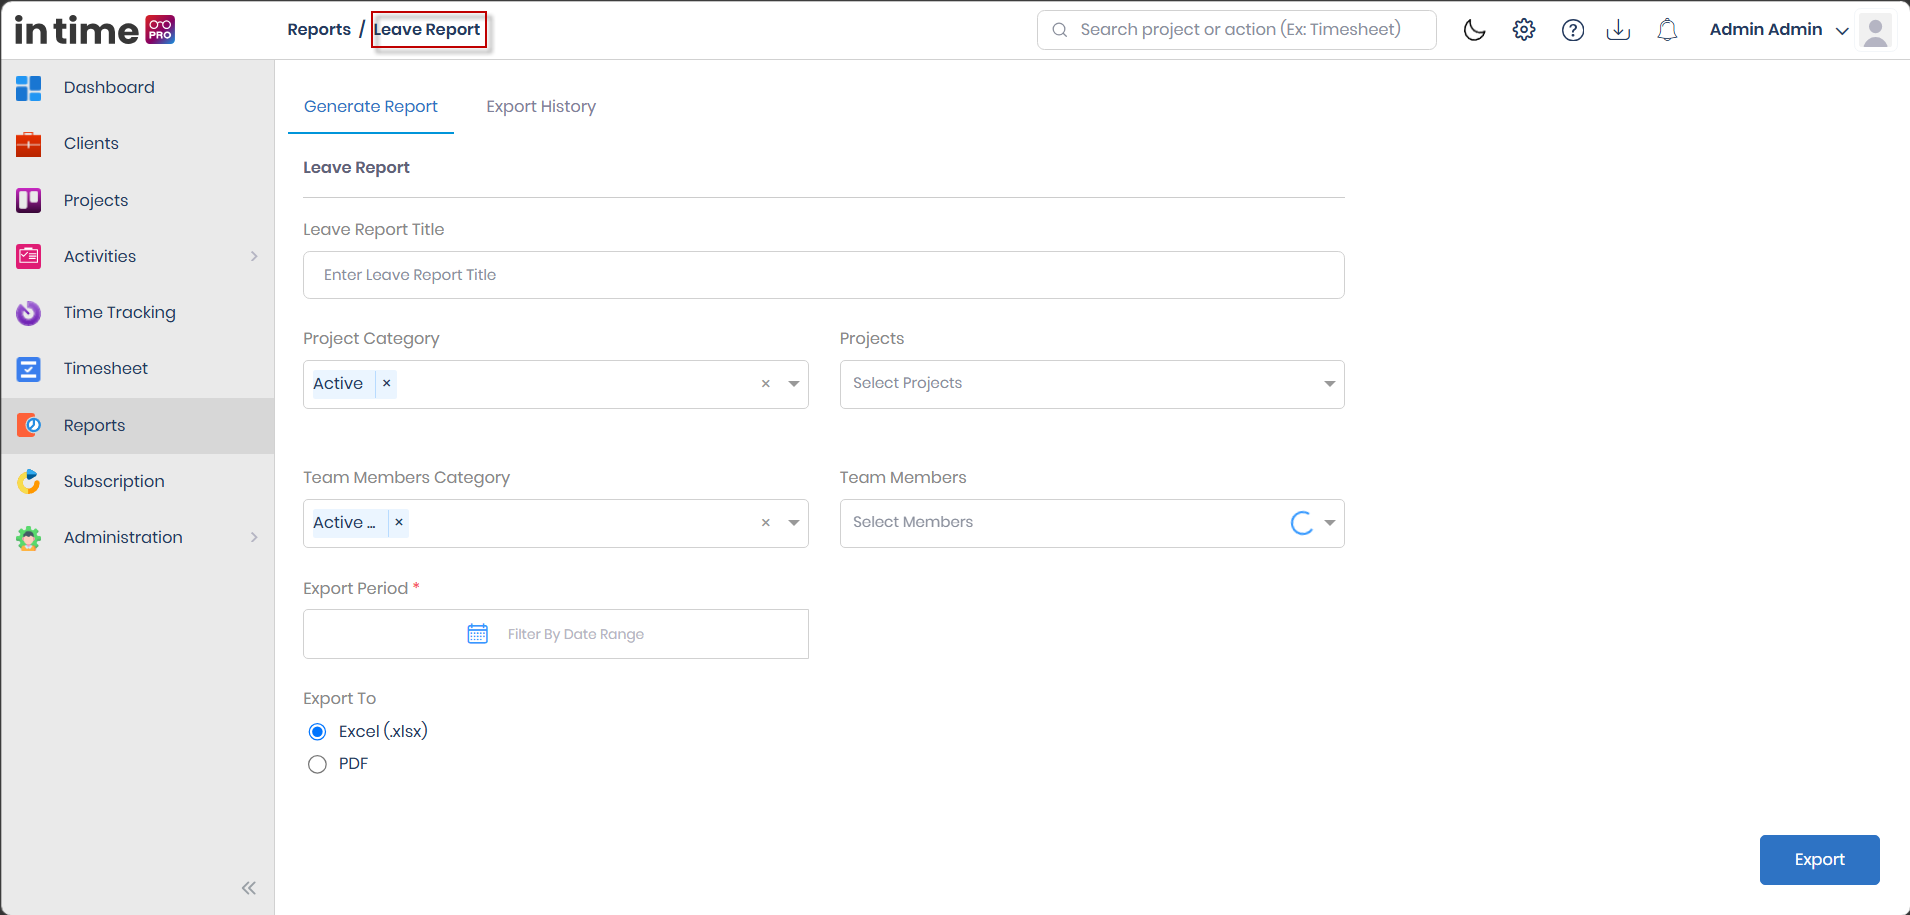
The screenshot above is included only to show what the Leave Report screen currently looks like. It is not a working feature — do not use it to try to generate a report, and treat any fields shown on it as inactive.
Because this feature is not yet available for use, this guide does not describe filters, export steps, or a downloaded file format for Leave Report — doing so would describe something you cannot actually do today. Once Leave Report is released for use, this section will be updated with full instructions, in the same level of detail as the other reports in this guide.
This disabled report is separate from the Leaves module itself, which is fully working — you can request and approve leave there today, even though this particular report format isn't available yet. If you need a leave balance rather than a report, an administrator can look this up from that person's profile under Manage Users → Leaves, and your own leave usage for the year appears as a summary widget on your Dashboard.
Attendance Report
Purpose
Attendance Report gives you a downloadable record of team member working times, arrival and leaving times, and productivity for a period you choose.
How to Open
Go to the main menu, select Reports, then select the Attendance Report card.
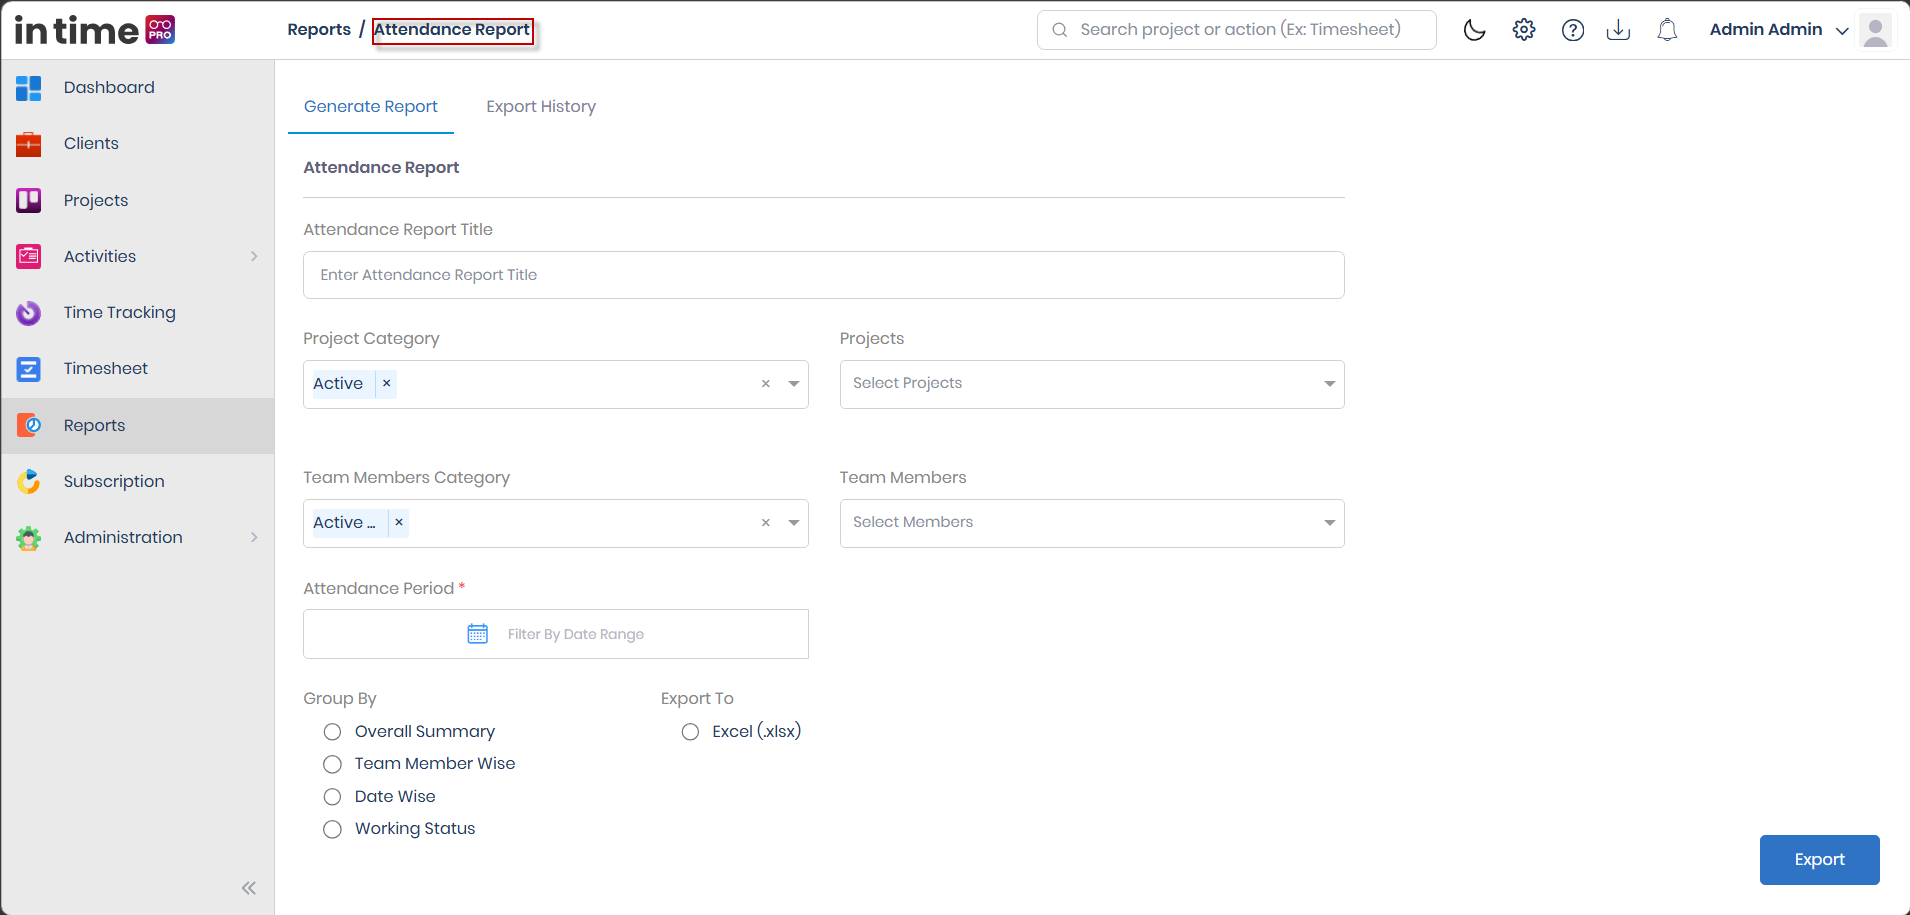
Attendance Report follows the same Generate Report / Export History layout as Timesheet Report. The Report Title, Project Category, Projects, Team Members Category, and Team Members fields work exactly as described under Timesheet Report above, so they are not repeated in full here.
Fields on this report
Most fields work exactly as described under Timesheet Report above:
| Field | Required? | Notes |
|---|---|---|
| Report Title | No | Same as Timesheet Report. |
| Project Category / Projects | No | Same as Timesheet Report. |
| Team Members Category / Team Members | No | Same as Timesheet Report. |
| Attendance Period | Yes | Same idea as Export Period, but you cannot select a date later than today — future dates are blocked in the date picker itself. |
| Billability | Not shown | This filter does not appear on Attendance Report. |
| Group By | Yes | See below. |
| Export To | Fixed | Excel only — there is no PDF option for Attendance Report. |
Group By
| Option | What it gives you |
|---|---|
| Overall Summary | A month-by-month attendance calendar for each team member, using short day codes (see below), plus a summary of payable and leave days. |
| Team Member Wise | One detailed sheet per employee, with daily arrival/departure times, productive/unproductive/neutral time, and overtime/undertime. |
| Date Wise | A single table with one row per employee per day, covering arrival, departure, active/idle/private time, and total time at work. |
| Working Status | A monthly sheet showing where each team member worked from (home, office, remote, or not specified) for each day. |
These four options are visible directly on the Group By section of the form shown in the screenshot above.
Day codes used in Overall Summary:
| Code | Meaning |
|---|---|
| P | Present |
| A | Full-day absent or on leave |
| 1/2 | Half-day absent or on leave |
| W | Weekend |
| H | Holiday |
Working Status location codes: WFH (Work From Home), WFO (Work From Office), WFR (Work From Remote), NA (not specified).
Exporting and Export History
Selecting Export works exactly as described under Timesheet Report – Exporting the Report — no confirmation pop-up is shown; you are switched directly to the Export History tab, where your file is prepared in the background and its progress is tracked. The same columns, sorting, pagination, and delete behavior described under Timesheet Report – Export History apply here as well.
Report Output
Your Excel file will look different depending on the Group By you chose:
- Overall Summary — one sheet per month, showing each team member's daily attendance calendar using the day codes above, plus a Summary sheet with expected payable days, worked days, leave taken, holidays, and total payable days.
- Team Member Wise — one sheet per employee, with a header of totals followed by a day-by-day table of arrival/departure, productive/unproductive/neutral time, required hours, overtime/undertime, and effectiveness.
- Date Wise — one table listing, for every employee and day: arrival and departure times, active/idle/private time, total time at work, idle time, and overtime.
- Working Status — one sheet per month showing each team member's working location for each day.
[SCREENSHOT: Attendance Report – Sample Excel Output]
Attendance Report only offers Excel as the export format. A PDF option is not available for any Attendance Group By option.
Productivity Report
Purpose
Productivity Report shows which applications a team member used, broken into five-minute intervals, across the working day.
How to Open
Go to the main menu, select Reports, then select the Productivity Report card.
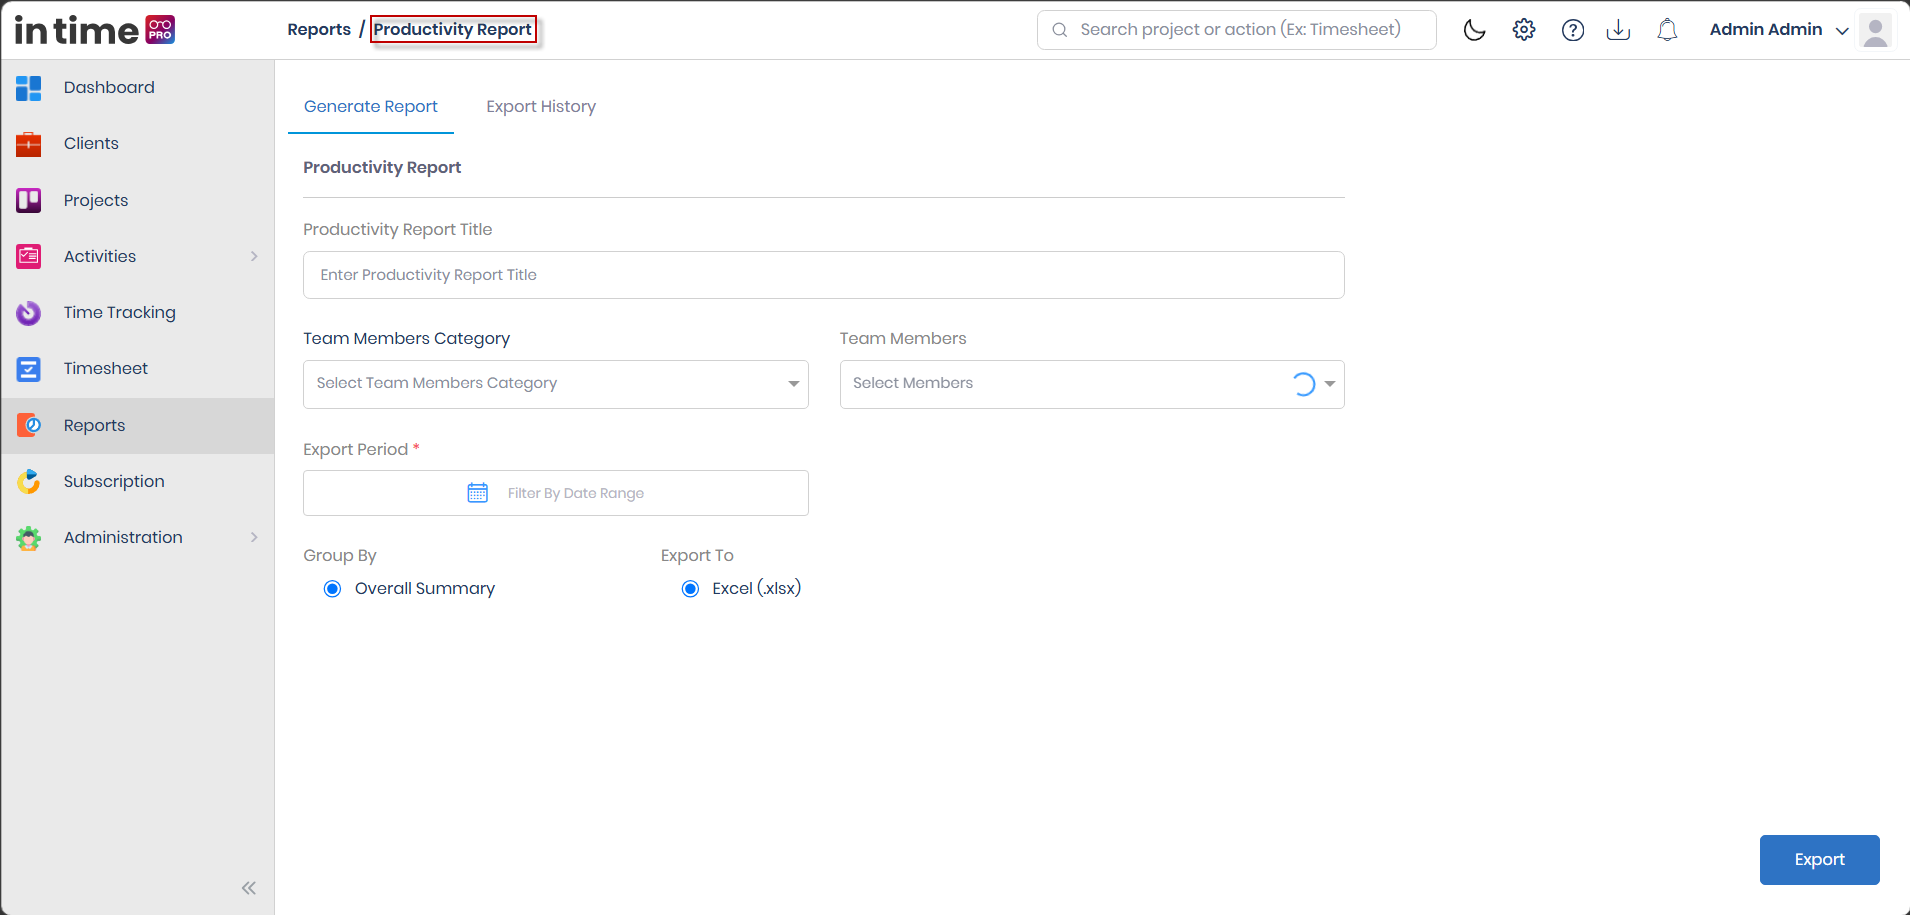
Productivity Report follows the same Generate Report / Export History layout as Timesheet Report. The Report Title, Team Members Category, and Team Members fields work exactly as described under Timesheet Report above.
Fields on this report
| Field | Required? | Notes |
|---|---|---|
| Report Title | No | Same as Timesheet Report. |
| Team Members Category / Team Members | No | Same as Timesheet Report. |
| Export Period | Yes | Same as Timesheet Report's Export Period. |
| Group By | Fixed | Only Overall Summary is available — there is nothing to choose here. |
| Export To | Fixed | Excel only. |
Not shown on this screen: Project Category, Projects, and Billability do not appear as filters on Productivity Report, as you can see in the screenshot above.
Exporting and Export History
Select Export once you have chosen your Export Period. As with Timesheet Report, no confirmation pop-up is shown — you are switched directly to Export History, where the same progress, download, and delete behavior described under Timesheet Report – Export History applies.
Report Output
The downloaded Excel file contains one sheet, listing: Date, Employee ID, Name, Email, User Roles, Group, Interval, Application, Productivity, and Time.
Each row is a 5-minute interval across the working day, marked as Productive, Unproductive, or Neutral based on the application used during that interval.
[SCREENSHOT: Productivity Report – Sample Excel Output]
Project Allocation Report
Purpose
Project Allocation Report shows which team members are allocated to which projects, either as a simple allocation list or as a comparison of projected versus actual hours.
How to Open
Go to the main menu, select Reports, then select the Project Allocation Report card.
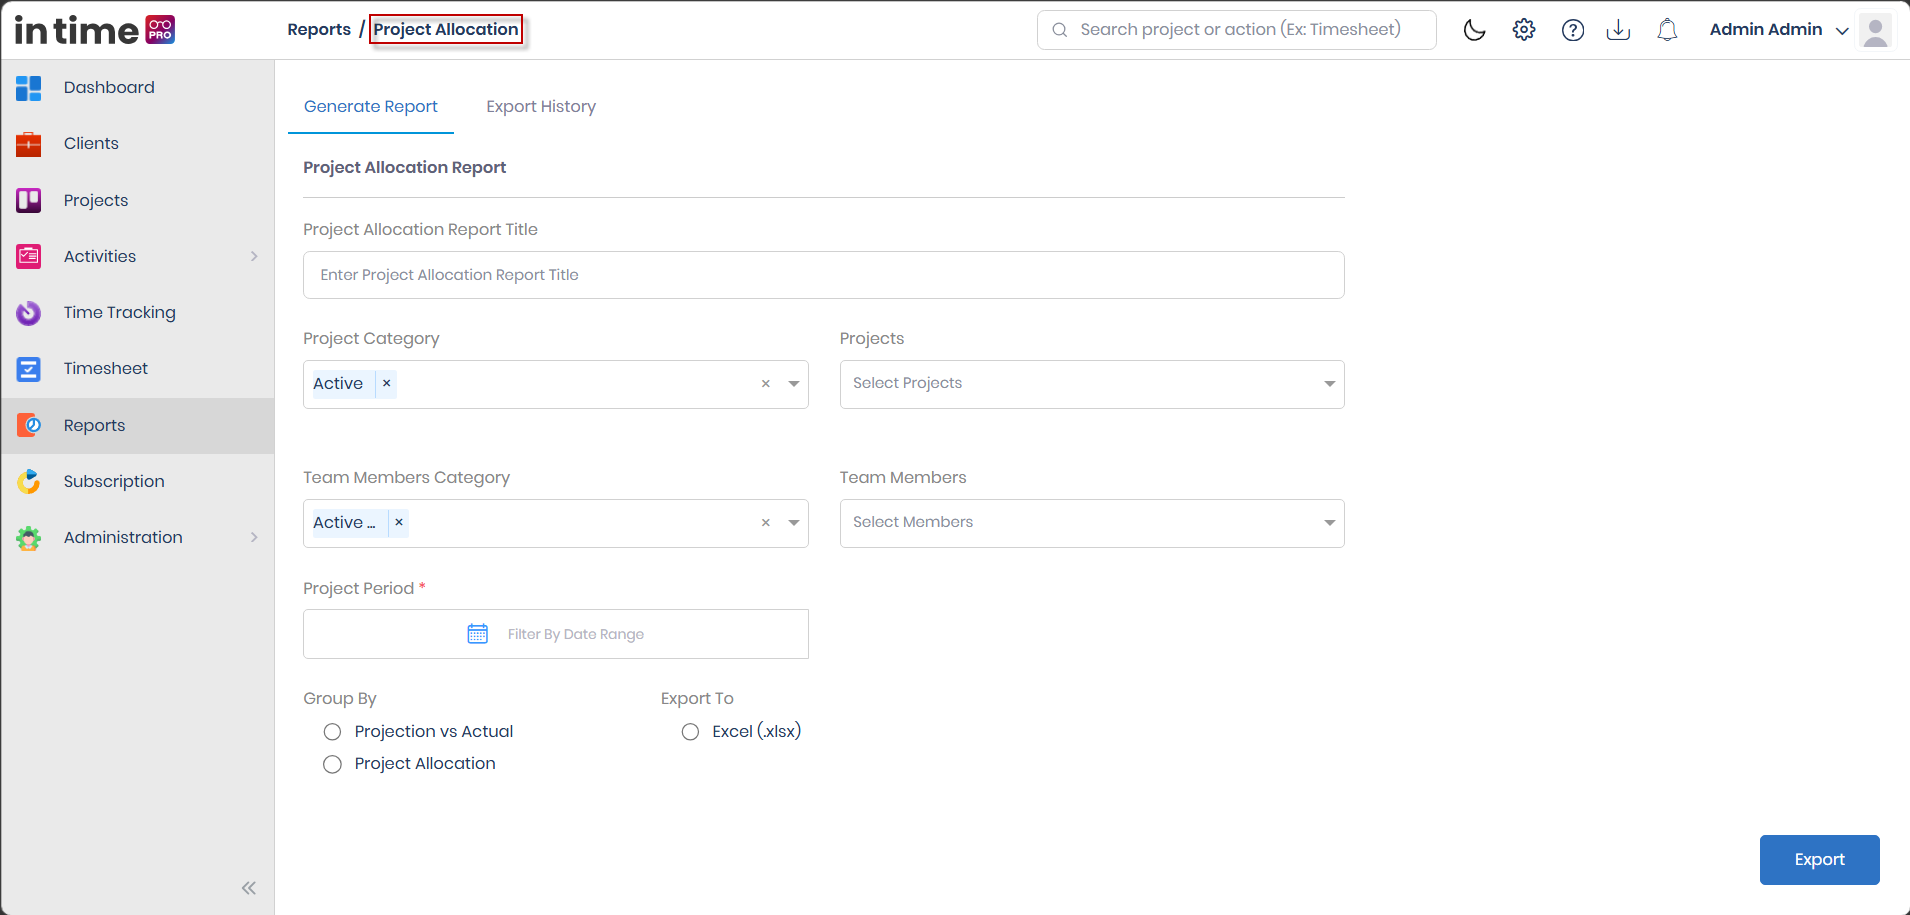
Project Allocation Report follows the same Generate Report / Export History layout as Timesheet Report. The Report Title, Project Category, Projects, Team Members Category, and Team Members fields work exactly as described under Timesheet Report above.
Fields on this report
| Field | Required? | Notes |
|---|---|---|
| Report Title | No | Same as Timesheet Report. |
| Project Category / Projects | No | Same as Timesheet Report. |
| Team Members Category / Team Members | No | Same as Timesheet Report. |
| Project Period | Yes | Works the same way as Export Period on Timesheet Report. |
| Group By | Yes | See below. |
| Export To | Fixed | Excel only. |
Group By
| Option | What it gives you |
|---|---|
| Projection vs Actual (default) | Monthly sheets comparing each employee's projected, logged, and billable hours, split into shorter periods within the month. |
| Project Allocation | A single list showing who is allocated to which project, their project role, project manager, and allocation dates. |
These two options are visible directly on the Group By section of the form shown in the screenshot above.
Exporting and Export History
Select Export once your Project Period and Group By are set. As with Timesheet Report, no confirmation pop-up is shown — you are switched directly to Export History, where the same progress, download, and delete behavior described under Timesheet Report – Export History applies here.
Report Output
- Project Allocation — Employee Id, Employee Name, Project, Project Role, Project Manager Name, Start Date, End Date, and Status. Status is worked out automatically: a row shows Un Allocated once its end date has passed, and Allocated otherwise.
- Projection vs Actual — one sheet per month, listing Project Name, Employee Name, Model (Fixed or Time & Materials), and Project/Delivery Manager, followed by Projected Hours, Logged Hours, and Billable Hours, each split across the month with a total.
[SCREENSHOT: Project Allocation Report – Sample Excel Output]
Common Questions and Known Limitations
Why don't I see any results on screen after I export? Reports in this module do not display on-screen tables or charts. Every result is delivered as a file you download from Export History.
I selected Export and nothing seemed to happen — is that a problem? No, that is expected behavior. Reports does not show a success message or confirmation pop-up when you select Export. Instead, the screen switches you straight to the Export History tab, where your new report appears with its progress. That switch to Export History is the confirmation that your export started.
Why can I only see myself in Team Members, even though I can see the whole project list? This is expected for Accountant and Contractor accounts under the current setup — the Team Members list for these roles is generally limited to the signed-in user, even when the Projects list shows every project you are entitled to.
Can I see reports my teammate or manager generated? No. Export History only ever shows reports you personally started, even for the same project and date range.
Why is there no PDF option on some reports? Excel is the only format offered for Attendance Report, Productivity Report, and Project Allocation Report. On Timesheet Report, PDF is available for Overall Summary and Task Wise, but not for Unsubmitted Timesheet.
Is Leave Report going to be available soon? Leave Report generation is disabled on ITP at this time. There is no confirmed date in this guide for when it will become available — check with your administrator for the latest status.